Edit Image in PDF
PDFgear lets you add new images or edit existing ones right in your PDF. Here’s how to do it on your iPhone or iPad:
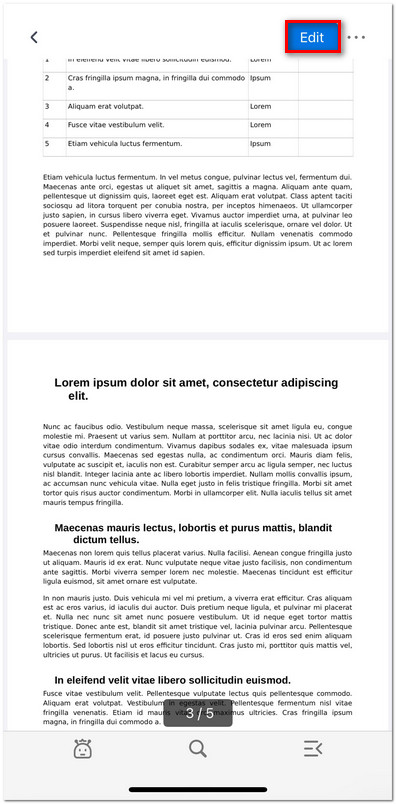
Add a New Image
- Open your PDF in PDFgear. Tap the Edit button in the top-right corner.
Click to Enter the Edit Mode
- Select Edit Image from the menu.
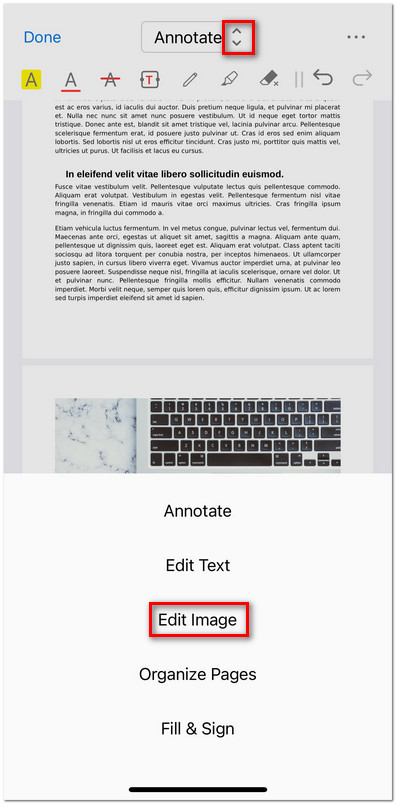
Select the Edit Image Mode
- Long-press on the page where you want to insert an image.
- Choose Add from the pop-up menu.
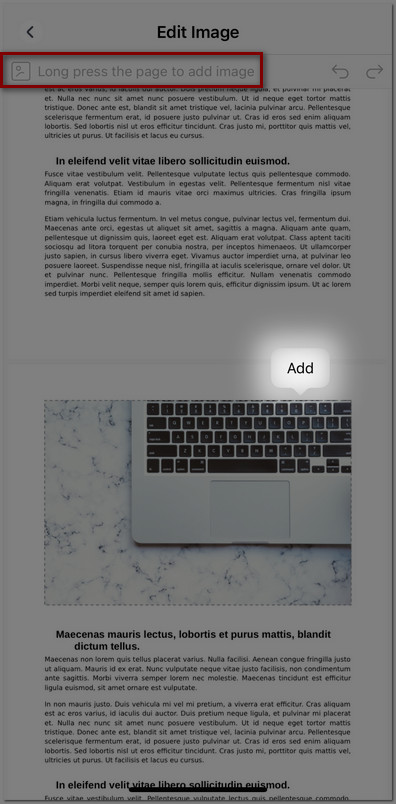
Add Image to PDF on iOS
- Select an image from your device, and it will be inserted into the PDF.
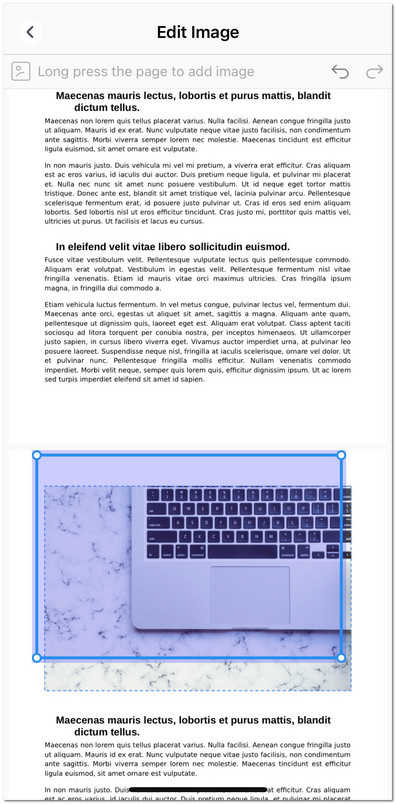
Reposition the Image in PDF on iOS
- Tap and drag the image to reposition it anywhere on the page.
Edit an Existing Image
- Open your PDF in PDFgear on your iPhone or iPad, then go to Edit Image mode.
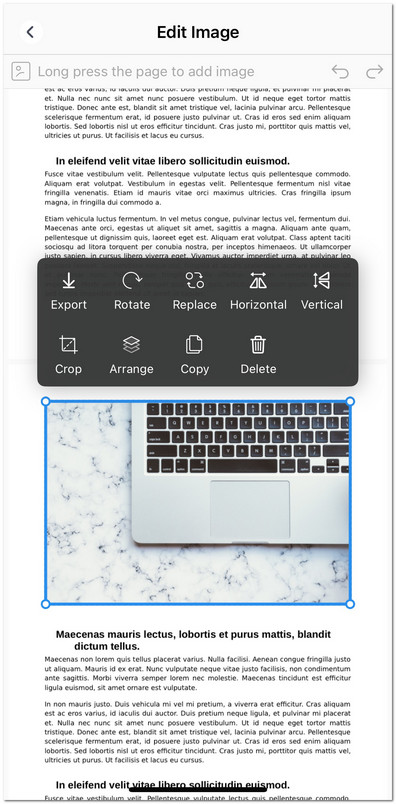
- Tap an image in your PDF to display the editing toolbar. You can:
Export: Save the image separately. Choose ‘Save to Photos’ or ‘Share through other apps’.
Rotate: Rotate the image in 90° increments.
Replace: Swap the current image with another one from your device.
Horizontal/Vertical Flip: Flip the image along the selected axis.
Crop: Drag the handles to trim unwanted parts of the image.
Arrange: Move the image forward, backward, to the front, or to the back.
Copy: Duplicate the image within the PDF.
Delete: Remove the image from the PDF.
Edit the Existing Image in PDF on iOS
- You can also tap and drag the image to reposition it on the page.
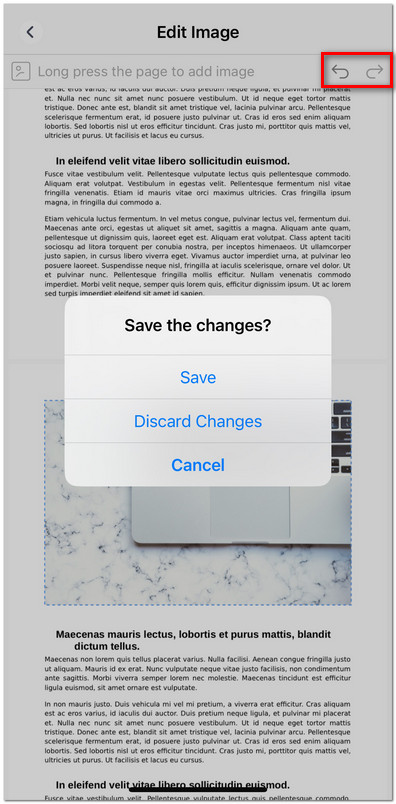
- Tap the Back arrow in the top-left corner when you’re done.
- Choose Save to keep changes, or Discard Changes to undo them.
Save the Edited Image