3 Easy Ways to Convert HEIC to PDF on iPhone and iPad

Summary :
It is a good idea to convert HEIC photos to PDF for better compatibility since HEIC is only supported by Apple devices. So check out how to convert HEIC to PDF on iPhone and iPad easily.
Table of Contents
Convert HEIC to PDF on iPhone
Since the release of iOS11, Apple has switched the default image format for future iPhone generations to HEIC. This format maintains image quality while minimizing file size. However, it’s worth noting that HEIC is exclusive to Apple devices, so it’s best to convert these files to PDF format before sharing.
In this article, we will explore the best methods for converting HEIC to PDF on an iPhone or iPad with ease, which is a good way to make a PDF on iPhone. Choose the most appropriate conversion method based on your needs and the information provided.
How to Convert HEIC to PDF Using Books App
Step 1: First you need to open the Photos app and select your favorite photos which you want to convert and hit Share. You can also choose multiple photos too.
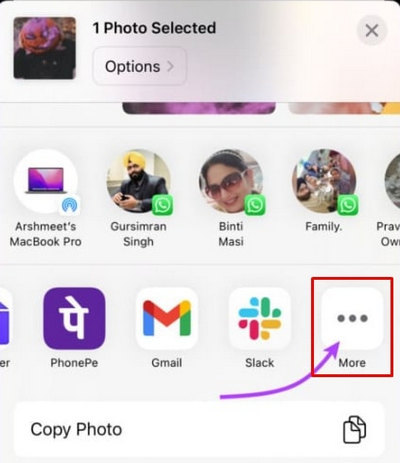
Find Books from More
Step 2: After that, tap the share icon and now select the Books app option from the list.
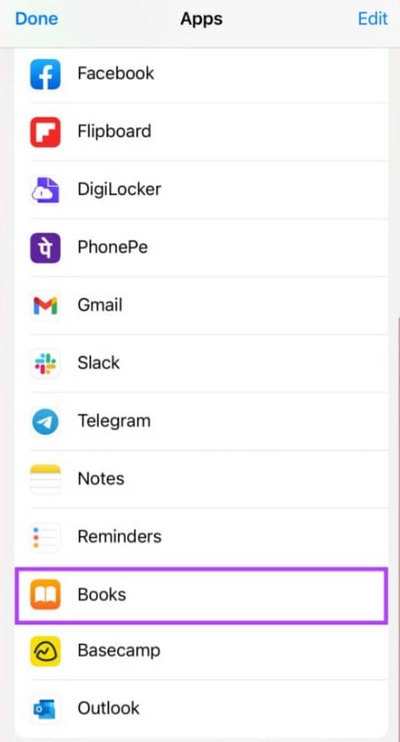
Select the Books App Option
It’s that simple. A PDF version of the photo will be instantly saved by the Books app.
The PDF will also automatically sync across all your Apple devices and iCloud if your iCloud sync for the Books app is enabled. Viewing, sharing, or renaming the PDF is as simple as tapping the three dots icon in the Books app.
There is a workaround for setting more pictures on one page in the Books app, but you can’t rearrange pages. You can share and edit your PDF, print it, set the layout, change the pages per sheet, and save or copy your files by tapping the three-dot icon three times.
How to Convert HEIC to PDF Using Files App
The method can be used in two different situations. Your photos can also be accessed directly from Files if you have them saved on an iCloud Drive, a Google Drive, etc. Upon converting all of the images at once, you will be able to convert multiple images to PDF at once.
This app has the inherent advantage of converting photos alphabetically or numerically. Therefore, before converting the photos, you can rename them according to their order. Moreover, if you want to know how to convert a screenshot into PDF then you can also check out a guide on it.
Step 1: Locate the folder with the photos in the Files app.
Step 2: Hold down the option button while selecting rename, and the files will be renamed.
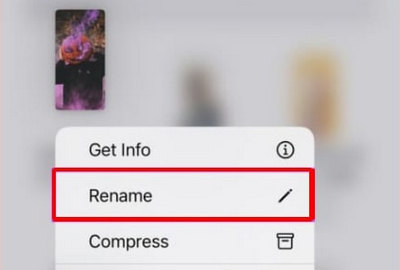
Click on Rename Option
Step 3: Once you have renamed the item, choose the Select option by tapping three dot icons.
Tap on Three Dot Icon and then Choose Select
Step 4: Choose the photos you would like to save as PDFs.

Select the Photos
Step 5: From the bottom right corner of your screen, click on the three-dot icon.

Now Click on Create PDF Option
Step 6: Click the Create PDF button.
It will now be available in the same location as the original PDF file. It can also be sent to other apps and contacts in addition to previewing and moving it.
NOTE: Additionally, you have the option of adding or deleting pages/images from the PDF file, or even save webpages as PDF using the Files app.
How to Convert HEIC to PDF Using Photos App
Step 1: Tap the Select button on the top-right corner of the Photos app.

Tap on Select Option
Step 2: Choose which images you wish to save as PDFs.
Step 3: Select Share from the menu.
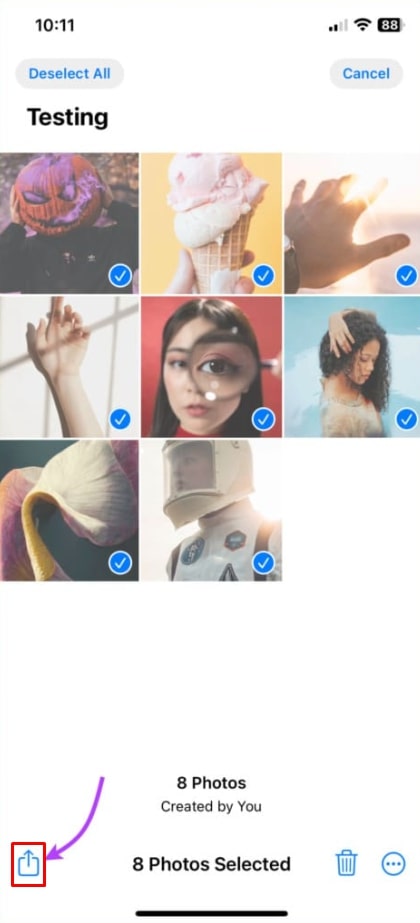
Choose the Photos and then Click on Share Button
Step 3: Navigate to the Share Sheet and select Print.
Step 4: Tap the Share icon again from the print preview page.
Step 5: The photo has been automatically converted to PDF. Once you’ve saved or copied it, you can use it however you like.

Now Click on the Print Button
Tip: Adding or removing images from a folder after you share them is not possible. In order to make the PDF document appear as you intended, choose the images consciously.
NOTE: A PDF’s page layout is predefined with this method. A PDF file consists of individual pages for each photo, you cannot group photos on one page. However, you only have a few options when it comes to changing the page size.
How to Convert HEIC to PDF on iPhone Online
There are many online converters that help you to convert the HEIC file to a PDF file on your iPhone and iPad easily. In this article, we are discussing the PDFgear converter. Follow the below steps carefully if you also want to convert your files online easily:
Step 1: First you need to go to the PDFgear HEIC to PDF Converter.
Step 2: Now click on the Upload HEIC Images option and then select the photos.
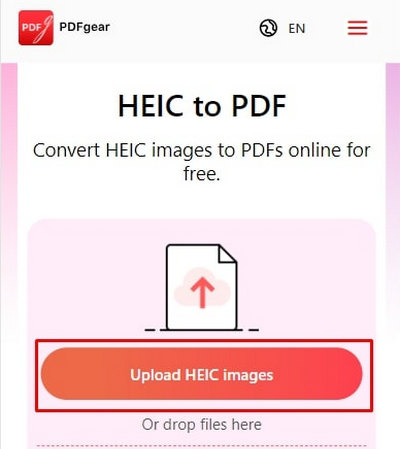
Upload HEIC Images
Step 3: You need to wait for some time till the file upload completely. After that, just click on the Convert option. Once it is converted, you can click on the Download button to download it in a PDF file.

Click on the Download Button
What is HEIC?
To clarify, HEIC is a version of HEIF, which stands for High-Efficiency Image File. This format allows for optimal file size while storing high-quality photos. Nevertheless, HEIC files may not always be supported by websites, apps, or Windows computers, making it difficult to transfer pictures between devices.
Final Verdict
HEIC is an impressive file format with its ability to maintain quality while maintaining such small file sizes. While sharing photos between multiple devices can be convenient, it can be a hassle. HEIC photos can be converted into PDFs, which are more common, by taking advantage of a few tricks and hacks. I hope that after reading our article which is about How to Convert HEIC to PDF on iPhone and iPad, you are able to solve your problem.