How to White Out a PDF for Free (The Right Way)

Summary :
In this article, PDFgear will help you understand the different bettween PDF white-out and redaction, and learn the right way to white out text or images in a PDF.
Table of Contents
What Does “White Out a PDF” Really Mean?
When you hear the phrase “white out a PDF”, you probably imagine the digital version of correction fluid—covering up mistakes or information you don’t want others to see. And you’re not alone. Thousands of people search for this exact phrase every month, but here’s the catch: most tutorials only show you how to put a white box over the text.
The problem? That’s not always enough. If the document contains sensitive details, simply covering it with a shape leaves the information intact and recoverable with just a few clicks. That’s why it’s important to understand the difference between visual white-out (cosmetic hiding) and true redaction (permanent removal).
The good news is that with PDFgear, you don’t have to choose the wrong method. Our tools give you both options:
- Annotation Tool: Quickly add a white box to cover text or images.
- Redaction Tool: Permanently erase confidential content so no one can uncover it later.
In this guide, we’ll walk you through both approaches, show you which one to use depending on your needs, and explain why PDFgear makes the process easier than other editors.
White-Out vs. Redaction: What’s the Difference?
Before you decide how to “white out” a PDF, it helps to know that there are actually two very different ways to do it. Many people confuse them, but the choice matters a lot depending on what you’re trying to achieve.
White-Out (Annotation Method)
This is the digital equivalent of painting over text with correction fluid. Using a shape tool, you draw a white rectangle over the content you don’t want to see. It looks clean, but the original text is still there underneath. Anyone can highlight, copy, or search for that hidden text.
One way to make this safer is to flatten the PDF after adding white-out annotations. Flattening merges the overlay and the text layer together, so the covered text is much harder to recover. If you want to learn more about flattening, check out our guide on how to flatten a PDF.
This method is fine for casual fixes—like covering a typo or hiding non-sensitive notes—but still not ideal for confidential data.
Redaction (Permanent Removal)
Redaction goes a step further. Instead of just covering content, a redaction tool permanently deletes it from the file. Once you apply redaction and save, that text or image is gone forever. It can’t be searched, copied, or uncovered. This is the method you need when working with contracts, IDs, financials, or anything containing sensitive information.
Here’s a quick comparison:
| Feature | White-Out (Annotation) | Redaction (Permanent) |
| Security | Low by default, safer if flattened | High – data is deleted |
| Permanence | Reversible (unless flattened) | Irreversible |
| Best Use | Cosmetic fixes or minor edits | Confidential/sensitive documents |
The takeaway: white-out is quick, but redaction is safe. And since PDFgear offers both annotation and redaction tools, you can choose whichever approach fits your situation best.
Permanently Remove Text with PDFgear’s Redaction Tool
If you need to hide sensitive or confidential information, the safest way is not just to cover it up but to erase it completely. That’s exactly what PDFgear’s Redaction Tool does. Once applied, the text or image is gone forever and can’t be uncovered, searched, or copied.
Here’s how you can white out a PDF securely with PDFgear’s redaction feature:
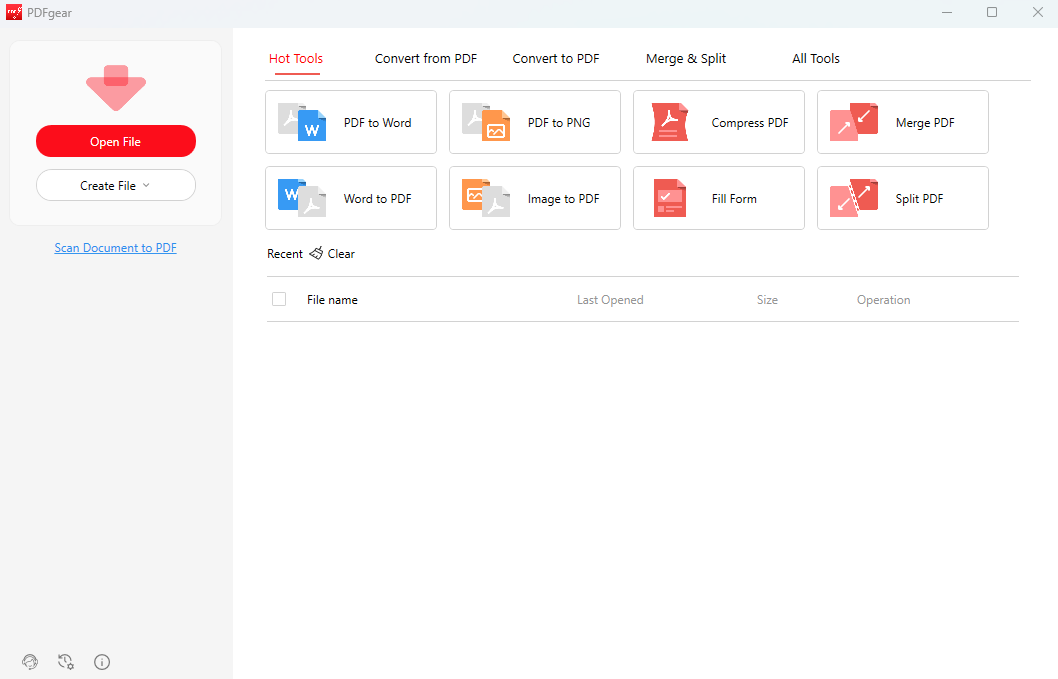
1. Open PDF in PDFgear on Windows or Mac
Download PDFgear, launch the app, and load the file that contains the text or images you want to remove.
2. Select the Redaction Tool
Go to the Protect section and click Redact on the upper menubar. This tool is designed to permanently delete content from the document.
3. Change the redaction appearance
By default, redacted areas are filled in black. For a cleaner look, click on the color panel above to change the redaction color to white.
4. Mark the content
Click and drag to highlight the text, image, or area you want to white out. A box will appear over your selection.
5. Apply the redaction
Once you’re sure about the areas you want to remove, click Exit Redacting. PDFgear will permanently remove the data behind those marks.
6. Save as a new file
Click Save as in the top-left corner to save a new redacted PDF. This way, you keep the original copy safe, while your new file is fully cleaned.
Redact on Windows
Why use PDFgear’s redaction tool?
- It’s free and available on both Windows and Mac.
- Unlike most online tools, it doesn’t just hide information — it actually removes it.
- You can customize the redaction color (black, white, or transparent) to match your preference.
Want a more detailed walkthrough? Check out our full guide on how to redact a PDF.
For anyone working with sensitive documents like contracts, medical files, or IDs, this is the only method that guarantees true security.
White Out a PDF with PDFgear (Annotation Tool)
Not every situation calls for permanent removal. Sometimes you just want to cover up a small typo, hide outdated notes, or make a document look cleaner before sharing. In these cases, PDFgear’s Annotation Tool is the fastest and simplest way to “white out” content.
Here’s how to do it:
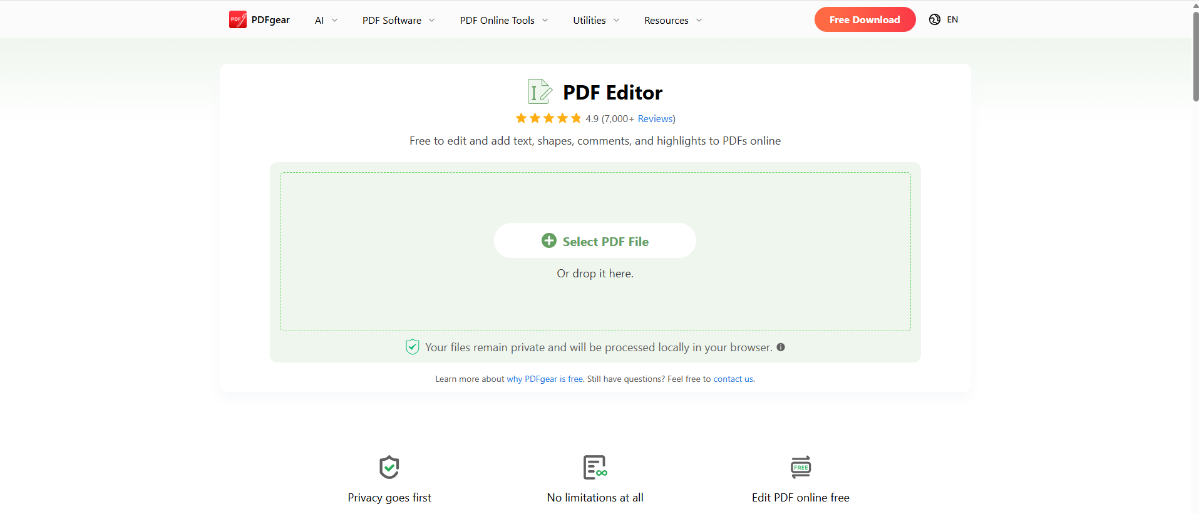
1. Open your PDF in PDFgear online editor
For simple whiteouts, you can use our free online editor right in your browser. Open your PDF with it.
2. Select the Shapes tool
Click on the Rectangle shape in the annotation toolbar.
3. Draw a white rectangle
Drag your mouse to cover the text or image you want to hide.
4. Set the fill and border color to white
Go to the upper menubar and change the shape’s stroke color and fill color to white. This blends the rectangle with the background.
5. Save your updated file
Click the Download file button to download and save your “whited-out” PDF.
Pro Tip: If you’re dealing with private information, add one more step — flatten the PDF. Flattening merges the white rectangle with the page layer, making it much harder for others to select or recover the hidden text.
When should you use annotation instead of redaction?
- Hiding typos or small design mistakes.
- Covering non-sensitive content before sharing.
- Quick edits that don’t require permanent deletion.
The annotation method is a great time-saver for basic edits, while PDFgear’s redaction tool remains the go-to choice when security is your top priority.
Alternative Methods: Other Tools You Might Hear About
If you’ve searched “how to white out a PDF” on Google, you’ve probably come across several different tools besides PDFgear. Let’s take a quick look at the most common ones — and why PDFgear often makes the smarter choice.
Adobe Acrobat (Paid)
Adobe Acrobat is the industry standard for PDF editing and includes a professional redaction tool. It works well and even lets you change the redaction fill color to white.
Quick Step: Open your PDF → go to Tools > Redact → mark text → set Fill Color to white → apply.
The catch? You need a paid subscription, which can be overkill if you just need to white out a few lines.
Mac Preview (Free, Built-in)
On macOS, the Preview app has a built-in redaction tool. But there’s a limitation: it only lets you black out the text. This means anyone viewing your document can see there was something hidden, even if they can’t recover it.
Quick Step: Open PDF in Preview → go to Tools > Redact → select text → save.
It works for privacy, but it doesn’t give you the cleaner “white-out” effect.
Smallpdf and Other Online Tools
Web-based editors like Smallpdf usually let you draw a white rectangle over text. While this looks fine at first, it’s just an annotation. The original text is still in the file, which means someone could copy-paste or search for it.
Quick Step: Upload PDF → choose Rectangle Tool → set border/fill color to white → drag over text → download.
They’re quick and convenient, but not secure for private information.
Bottom line:
- Adobe Acrobat = powerful but paid.
- Mac Preview = free but only black-outs.
- Online editors = easy but insecure.
- PDFgear = both free and flexible — with a proper redaction tool for secure removal and an annotation tool for quick white-outs.
Common Mistakes and Pro Tips
Whiting out or redacting a PDF seems simple, but there are a few pitfalls that can leave your edits incomplete. Here’s what to watch out for — plus smart tips to make sure your document is truly safe.
1. Relying only on a white box
Mistake: Drawing a white rectangle over text hides it visually, but the content is still there. Anyone can copy or search for it.
Pro Tip: If you only need a cosmetic fix, use flatten or print to PDF after adding the white box. Then reopen the file and test it by searching or selecting text. For private data, skip annotation entirely and use the Redaction Tool for permanent removal.
2. Forgetting to double-check
Mistake: Assuming the edit worked without testing.
Pro Tip: Always verify by reopening the file and:
- Searching for a word you “whited out.”
- Trying to select or delete the white box.
If the text still shows, your edit wasn’t secure.
3. Losing your original file
Mistake: Saving over the original after applying redaction. Since redaction is permanent, you can’t get the content back.
Pro Tip: Save the cleaned version under a new name (e.g., “report_redacted.pdf”). That way, you still have the original if you need it.
4. Using the wrong tool for the job
Mistake: Choosing annotation for sensitive data or thinking all tools work the same.
Pro Tip: Match the tool to the need:
- Annotation for quick, non-sensitive edits.
- Redaction for secure, permanent removal.
5. Skipping OCR for scanned PDFs
Mistake: Trying to white out or redact a scanned PDF without converting it. Since it’s just an image, the text isn’t selectable.
Pro Tip: Run OCR (Optical Character Recognition) first. This makes the text selectable so you can securely redact or white it out. PDFgear includes OCR, so you can handle scans just as easily as digital files.
FAQs
How to white out a part of a PDF?
PDFgear allows you to flexibly white out a part of a PDF using the shape tool, or redact a part of a PDF using the redaction tool. You only need to draw a preferred shape on the PDF.
Can people undo my white-out edits in a PDF?
To prevent other people from undoing your white-out, you can either flatten the PDF if you used the annotation method, or simply use PDFgear’s redaction feature, which removes content permanently.
Is PDFgear’s redaction tool really free?
Yes. The PDFgear app includes a professional redaction feature at no cost. Unlike many premium PDF editors, it allows you to permanently remove sensitive information without subscriptions or hidden fees.
Can I change the color of white-out or redaction?
PDFgear’s online editor allows you to change the color of the white out before the white-out, and the desktop app allows you to flexibly change the color of white-out/redaction before it’s applied to the document.
What happens if I accidentally redact the wrong text?
Since redaction permanently removes content, the only way to recover it is to reopen the original file (before redaction). Make a copy before redaction, and always double-check your selections before saving.
Conclusion: Choose the Right Way to White Out a PDF
“Whiting out” a PDF can mean two very different things. If you only need to cover up a small mistake, a quick annotation with a white box does the job. But if you’re handling sensitive information, the only safe choice is redaction, which permanently deletes the data from the file.
With PDFgear, you don’t have to worry about picking the wrong method. You get both options in one free tool:
- Annotation Tool for fast, cosmetic fixes.
- Redaction Tool for secure, permanent removal.
On top of that, PDFgear supports OCR for scanned documents, giving you the flexibility to handle any PDF safely.
So the next time you need to white out a PDF, skip the guesswork. Use PDFgear to do it the right way — whether that means a simple visual edit or true, permanent redaction.
Download PDFgear for free and try it today.