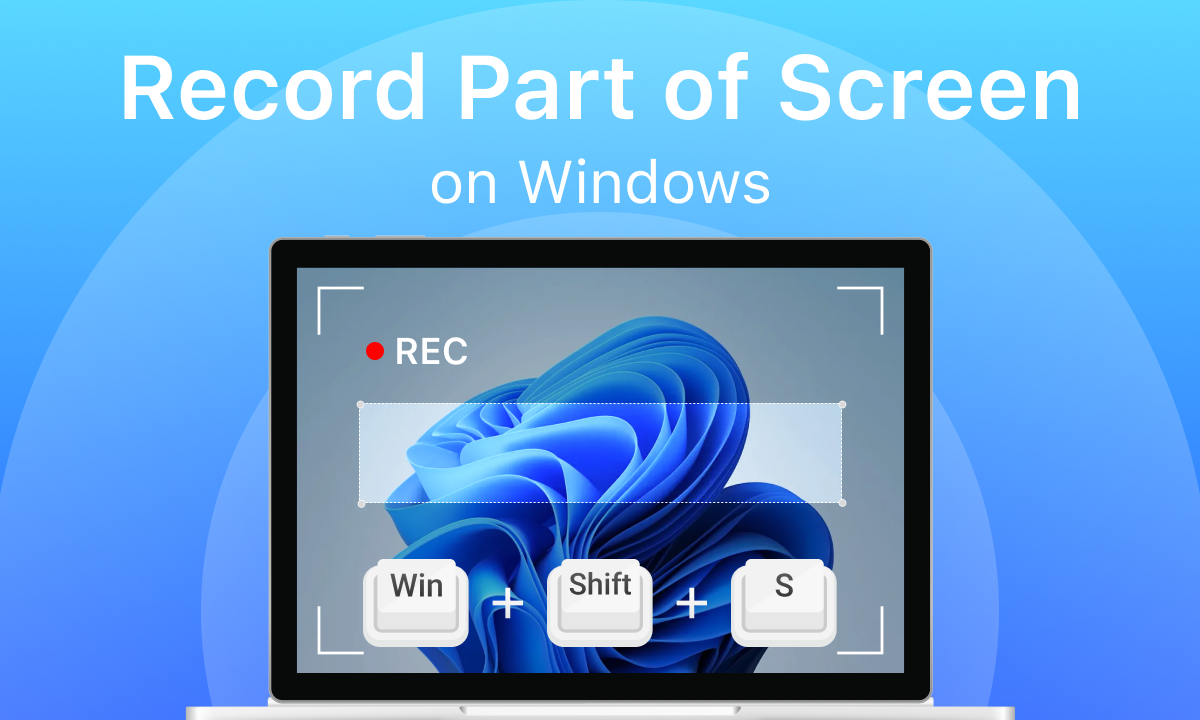
[3 Free Ways] How to Record Part of Screen on Windows

Summary :
Learn about the 3 free and simple ways to record only a part of your screen, highlighting your presentation and ensuring privacy.
Table of Contents
How to Record Part of Screen on Windows
Screen recording on Windows is a great way to capture important moments of real-time activities. Whether you’re creating focused tutorials on complex topics or need to hide personal information on your PC, it’s often essential to record only part of the screen.
You may have tried Xbox Game Bar to record the screen. However, this tool can not record a specific part of the screen.
But don’t worry, there are still several free methods available to record a portion of your screen. Let’s take a look at them.
Record Part of Screen on Windows 10/11 with Snipping Tool – No App Installation
Without any installation, the built-in utility Snipping Tool provides users with an easy and convenient way to capture screens.
This recorder is integrated with Windows 10 and 11, performing efficiently without impacting system performance even when operating alongside other applications.
Here’s how to facilitate portion-screen recording with the Snipping Tool:
Step 1. Open Snipping Tool by pressing Windows + Shift + S or open it in Start Menu: Click the Start button (Windows icon) in the lower-left corner of your screen > Type “Snipping Tool” and press Enter.
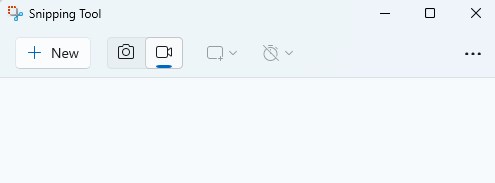
Open Snipping Tools
Step 2. Choose Record in the toolbar (icon with a camera), then click and drag your cursor (a cross) to select the area you want to capture. A resolution of the selected area will show in the lower-right corner of the section for indication.
Step 3. After choosing the section, you can tap the Start button to start recording. You can also enable external and internal audio capture by tapping the two icons that are next to the timing.
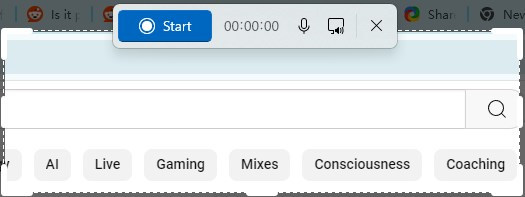
Select the Area for Screen Recording
Step 4. Click the Stop button (solid square icon) to end the recording, or click the pause button to temporarily halt the recording.
Step 5. The recorded video will automatically appear in a pop-up window for preview. You can then save it by clicking the “Save” button (a file icon).

Save the Screen Recording File
While Snipping Tool is handy for tasks like YouTube video recording with sound or zoom meeting recording, it provides only basic recording features. For complex recording tasks, OBS Studio covers your needs with its advanced features.
Record Part of Screen on Windows with OBS Studio – A Pro Screen Recording Option
OBS Studio is a free and open-source recorder that performs well on Windows 7/8/8.1/10/11. As an excellent cross-platform software, it also helps record screens at high quality on Mac.
OBS Studio enables you to choose and record specific portions of your screen. The multiple-source recording feature lends a hand to layered content creation. Without further ado, let’s get started!
Step 1. Navigate to OBS Studio’s official website. Download and Install the software on your Windows. Then, run OBS Studio.
Step 2. Find the “Scenes” box at the bottom left of the OBS window > Click the “+” button to add a new scene and name it > Click “OK.”
Step 3. In the “Sources” box, click the “+” button > select “Display Capture” > Name the display capture source as you prefer > Click “OK.”
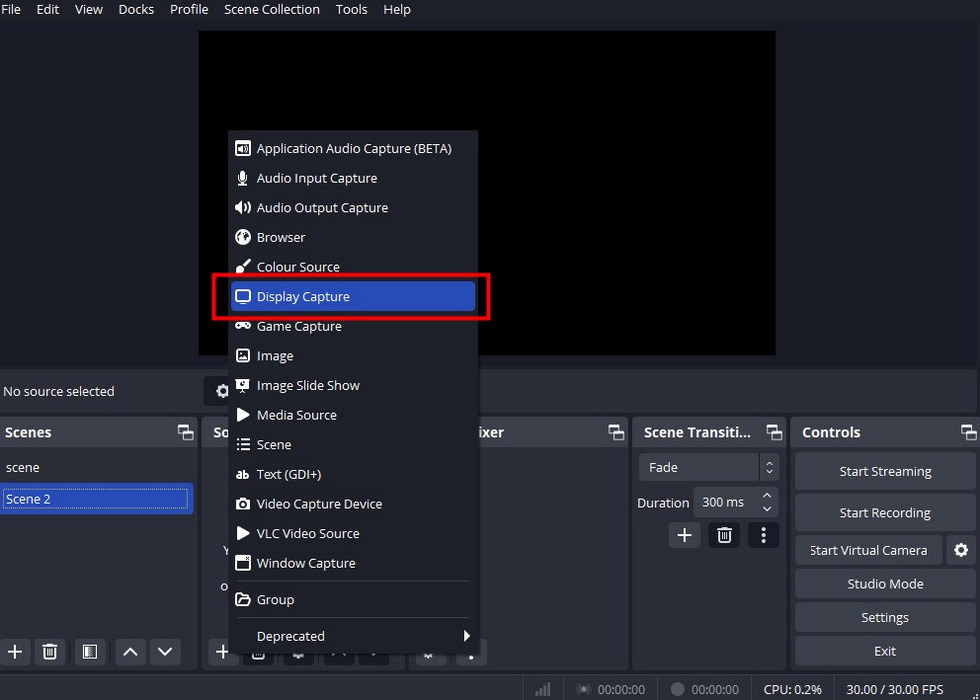
Choose Display Capture
Step 4. In the properties window, select the display you want to capture from the drop-down menu and click “OK.”
Step 5. Drag the red line in the preview window to select the part you want to record. Or, right-click “Display Capture” > “Transform” > “Edit Transform.”
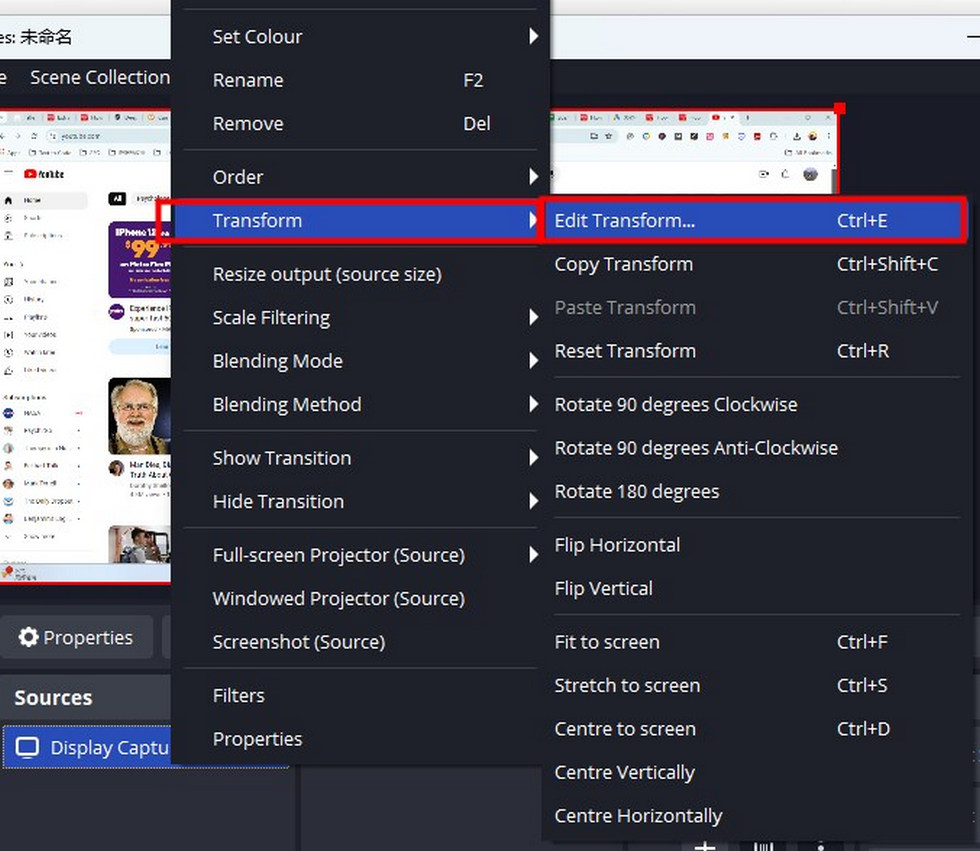
Select Transform for Part of Screen Recording
Adjust the “Crop” settings (left, top, right, bottom) to capture only the part of the screen you need. Input specific pixel values to precisely define the cropped area.
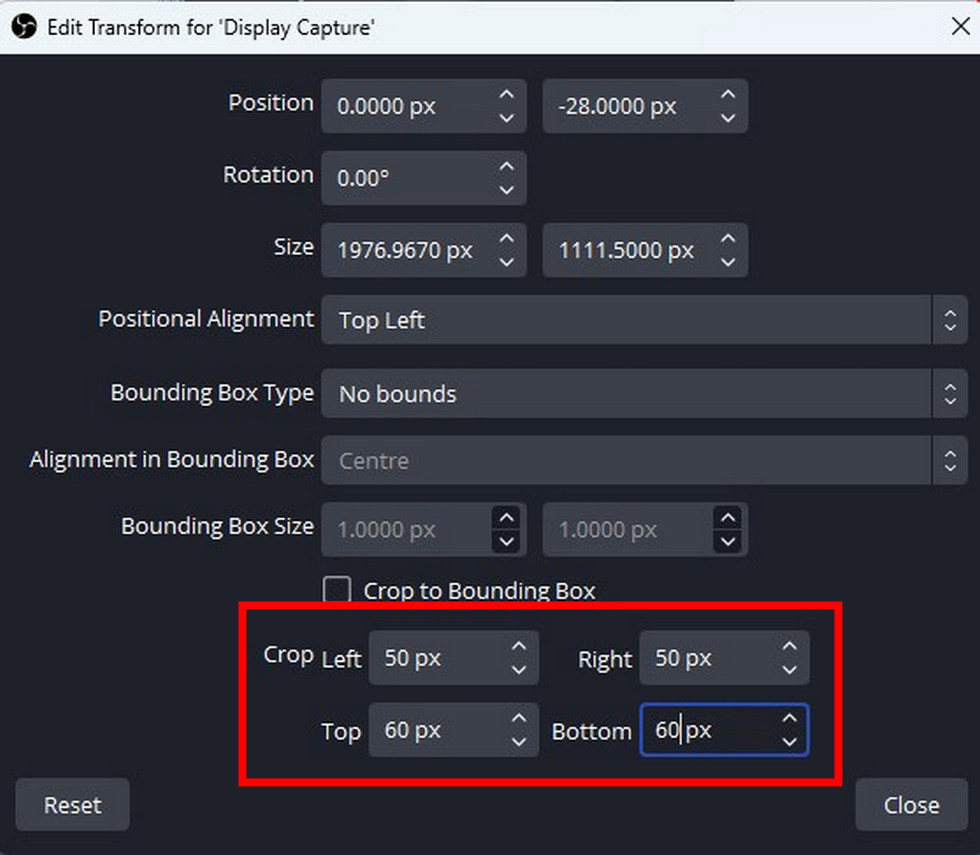
Edit Transform in OBS Studio
Step 6. Configure Settings by clicking “Settings.” There you can select the recording format and set the recording resolution, rate frames, and destination folder.
Step 7. Click the “Start Recording” button on the right side of the window to start recording.
Step 8. Click the “Stop Recording” button to end the recording.
The wide range of features of OBS Studio brings a more professional performance. However, the learning curve is steep for many users.
Record Part of Screen on Windows with ShareX – A Superior User Experience
Like OBS Studio, ShareX is also open-source and free but appears with a more concise and clear interface.
Keep being updated, this program is available for Windows 7, 8.1,10, and 11. You can obtain it from its website and the Microsoft Store.
Follow the steps below to record a section of your screen now.
Step 1. Download ShareX and launch it on your PC.
Step 2. Click on “Task Settings” in the left sidebar > Go to “Capture” settings and select “Screen recording options” > Adjust settings like frame rate and video quality to your preference.
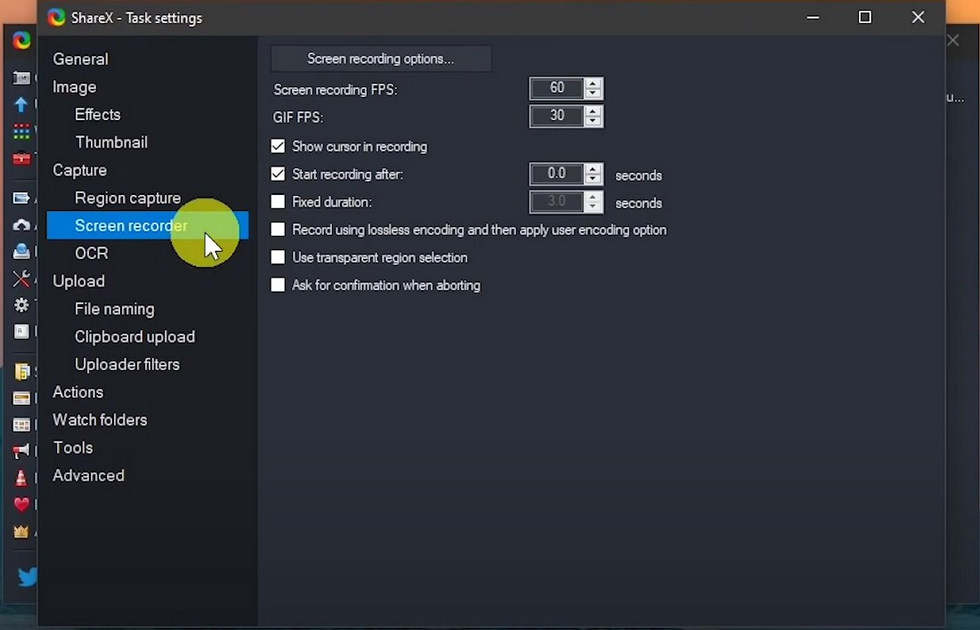
Set Up Screen Recording in ShareX
Step 3. Go back to “Capture” in the toolbar. Select “Screen recording” and drag to outline the area you want to record.
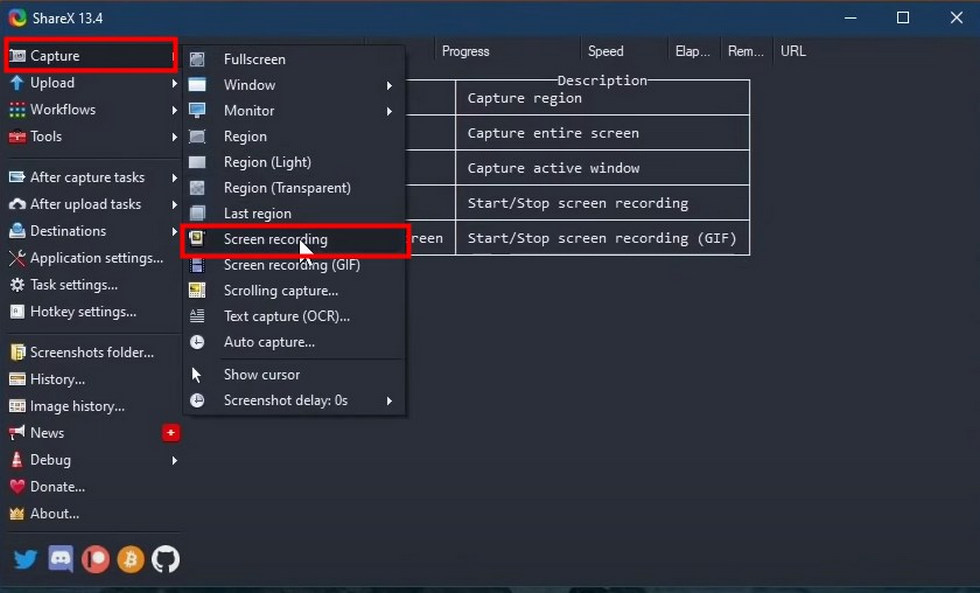
Choose Screen Recording in ShareX
Step 4. The recording will start automatically once the area is selected.
Step 5. Click the “Stop” button in the toolbar at the bottom of the recording area. Alternatively, press the hotkey (usually Shift + Print Screen).
ShareX also offers basic editing tools to trim or split recordings. Access these by right-clicking the recorded file in the “Recent tasks” list and selecting “Open in Image Editor” or “Open in Video Editor.”
FAQs
Is there a built-in tool in Windows to record the screen?
Yes, Windows 10 and 11 have built-in tools called Xbox Game Bar and Snipping Tools, which can be used to record the screen.
What are the limitations of the Windows Game Bar for screen recording?
The Windows Game Bar has several limitations for screen recording. It cannot record part of the screen but the entire screen. Audio recording is basic, without advanced controls or multi-track support. Recordings are saved in large MP4 files and are limited to a maximum length of 4 hours. Additionally, it does not support features like multiple monitor recording, webcam overlay, or scheduling recordings.
Can I edit my screen recordings directly in the recording software on Windows?
Yes, software like OBS Studio, Camtasia, or Bandicam allows users to make real-time adjustments and enhancements during the recording process.
What are the apps to record part of the screen on Mac?
The built-in app QuickTime Player and third-party app Record Go enable part of screen recording on Mac. They are both free and easy to use.