How to Add Images to PDF for Free

Summary :
Need to add a logo, signature, or image to a PDF — even without Acrobat or watermarks? Learn quick, free ways to do it online or offline using PDFgear and built-in tools.
Table of Contents
Adding a simple image to a PDF often turns into a mini tech headache — broken layout, blurry graphics, or surprise paywalls. Whether it’s a signature for a form, a photo for a resume, or a chart for a report, the right tool makes all the difference.
In this guide, you’ll learn how to add images to PDFs for free — without watermarks or lost formatting — using both built-in tools and professional-grade PDF editors, such as PDFgear. Let’s start with the fastest option: PDFgear online PDF editor.
Add Images to PDF Online Free (Recommended)
If you just need to drop a logo, signature, or picture into a PDF and be done in under a minute, PDFgear’s free online editor is the easiest place to start. It works right in your browser — no installation, no sign-up, and no surprise watermarks when exporting your edited work.
Far more capable than most basic editors, PDFgear preserves the original size and image quality. You can also adjust the transparency to make it blend naturally into your document.
How to Add an Image to PDF Using PDFgear Online Editor:
Add Images to PDF with PDFgear Online Editor
1. Visit PDFgear Online Editor and drop your PDF file.
* Your files are merely “uploaded” onto your browser, instead of our server or any network, and will be processed locally in your browser throughout the entire editing process.
2. Click “Add Image“ in the toolbar.
3. Choose an image (JPG, JPEG, PNG, etc.) from your device. Then drop it to the exact spot you want.
4. Resize, adjust the image as needed.
Tips:
- Use the opacity slider to adjust transparency — perfect for subtle logos or watermark-style visuals.
- Right click the image, you can cut, copy and paste it elsewhere — super convenient when you need to place the same signature or watermark onto multiple pages.
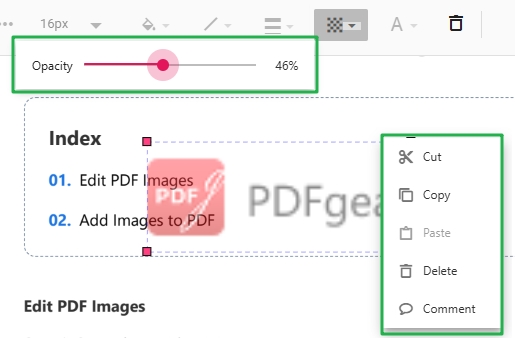
Adjust Image Opacity and More Edits
5. Click “Download PDF” to save your updated PDF, completely free and watermark-free.
Why PDFgear Online Editor Works Well:
- No installation required: open it in Chrome, Safari, or mobile browsers anytime.
- Transparency control: make your image blend perfectly with text or graphics.
- No hidden limits: edit and download without logins, ads, or usage caps.
- Instant results: ideal for quick fixes, resumes, or signing forms on the go.
If you often work with sensitive or large PDFs and prefer to stay fully offline, PDFgear also has desktop and mobile software that give you the same editing freedom without relying on the internet. Let’s look at how that works next.
Add Images to PDF Offline
If you often work with large, private, or sensitive PDF files, or simply want the fastest, most stable editing experience, the PDFgear app is the perfect fit. It lets you insert new images to PDFs or replace old ones with new ones locally on your device — no uploads, and no watermark. Everything runs securely offline, so your files never leave your computer or phone.
How to Add an Image with the offline PDFgear App:
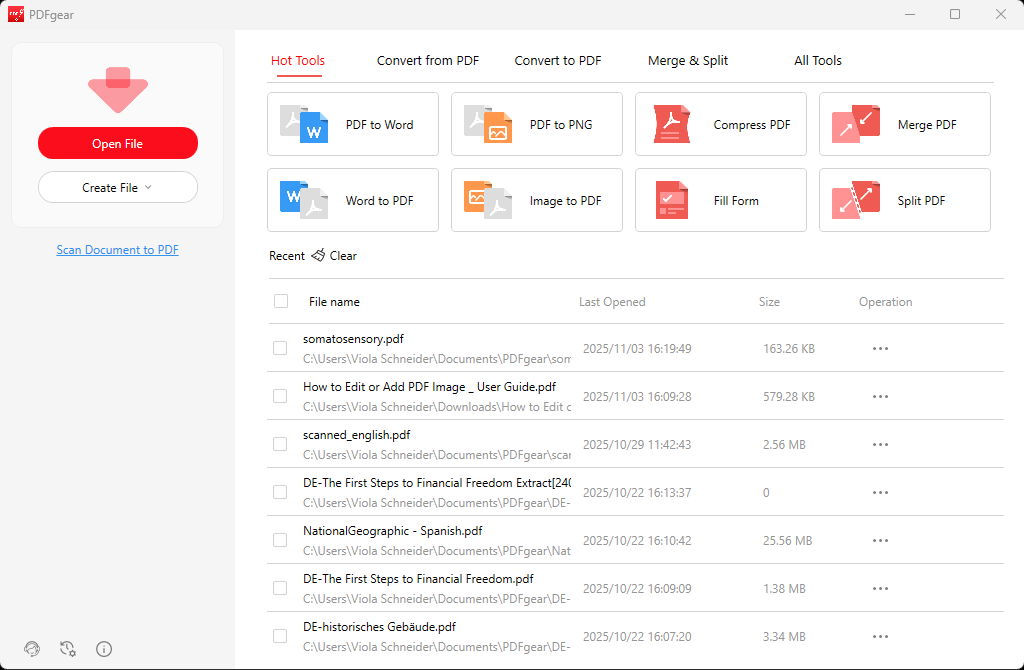
Add Image to PDF and Edit it with PDFgear Software
1. Download and install PDFgear software. Then open your target PDF file with it.
2. Click “Edit” on the top toolbar → select “Add Image”.
3. Choose the image (JPG, PNG, BMP, etc.) and click anywhere on the page to place it.
4. Drag to reposition and resize, rotate, flip the image freely.
Tip
To replace an existing image: Right-click the image > Select Replace, then choose a new file.
The “Replace” option appears when the image in your PDF is selectable — that is, not part of a scanned page.
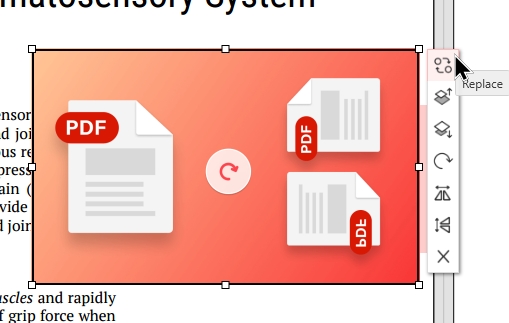
Replace Added Image With Another
5. Save your PDF once done — the changes are applied instantly and locally.
For more PDF image editing tricks, check out How to Edit Images in PDF for Free
Advantages compared to the online method:
- Works entirely offline (no upload needed).
- Supports direct image replacement and editing via right-click.
- Fast and stable for large or multiple PDFs.
If you just need a quick fix — like adding a small photo or signature to a PDF — your computer might already have what you need.
Tools like Preview on Mac or Microsoft Word on Windows can add images without installing anything extra.
They’re handy for simple edits, but may lack the precision and flexibility of PDFgear.
Add Pictures to PDF in Mac Preview
Preview can add an image to a PDF, but it uses a clipboard trick rather than a visible “Insert Image” button. It’s fine for quick jobs like signatures or small photos.
Steps:
1. Open your PDF in Preview. Also open the image file you want to insert (in Preview or another viewer).
2. Press Command + C to copy the image.
3. Switch to your PDF window and press Command + V to paste it. Drag to position and resize the image as needed.
4. Save or export the updated PDF.
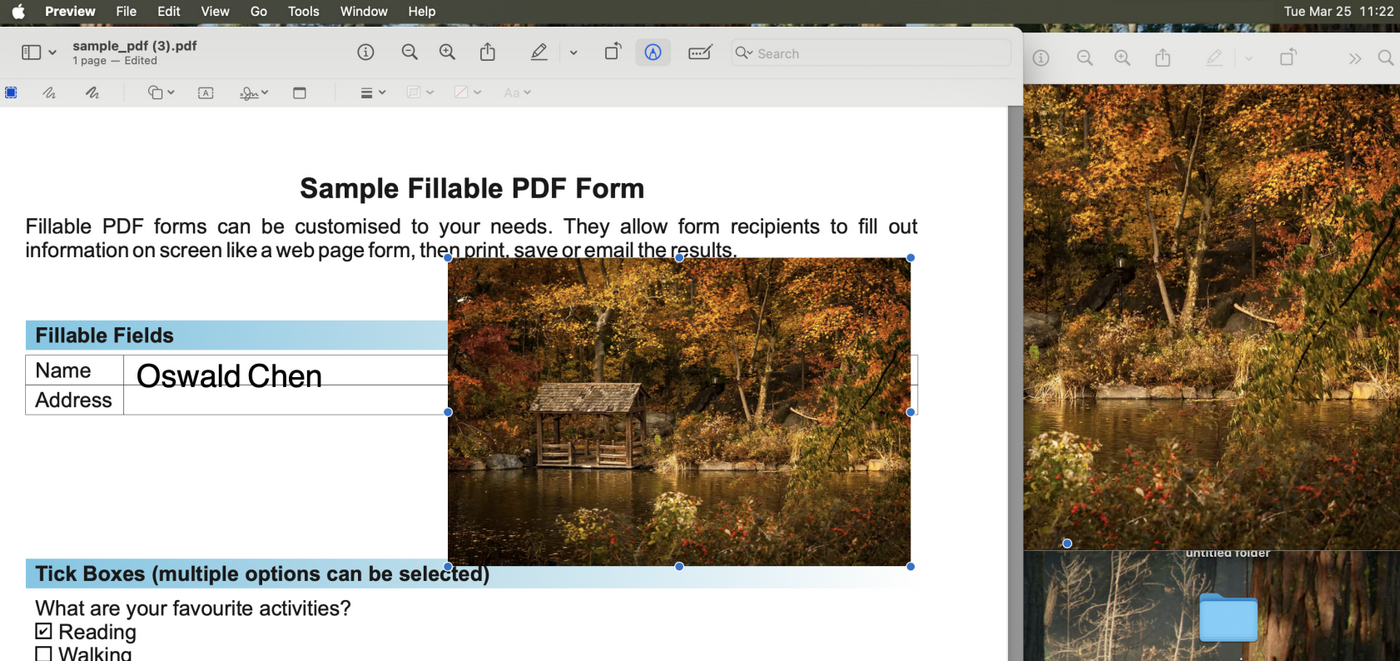
Copy and Paste Image to PDF in Mac Preview
Pros:
- Already installed on every Mac.
- Fast and straightforward for small edits like signatures or photos.
Cons:
- No transparency or layering options.
- Only available on macOS.
If you only need to add one image to a simple PDF, this might be enough. But for cleaner visual control, PDFgear handles transparency and layout preservation much better.
Want to see detailed screenshots or learn extra methods? Check out How to Add Image to PDF on Mac for Free
Insert Photos in PDF Using Microsoft Word
On Windows, Microsoft Word can double as a basic PDF editor. It’s a good fallback when you need a quick visual adjustment and don’t want to install extra software.
Steps:
1. Open your PDF in Microsoft Word — it’ll automatically convert into an editable format.
2. Go to Insert → Pictures and select your image.
3. Adjust the position using Wrap Text → In Front of Text or Behind Text.
4. When you’re done, export or Save As PDF.
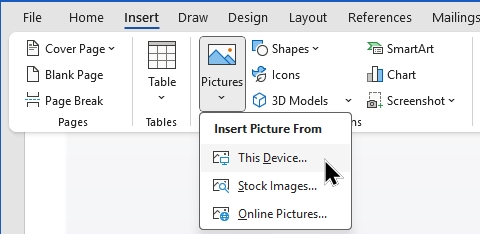
Add Images To PDF Using Word
Pros:
- Familiar, easy-to-use interface.
- Good for quick edits in text-heavy PDFs.
Cons:
- Conversion may shift layouts or fonts.
- No transparency or opacity options.
- Not ideal for precise visual work.
While these built-in options are convenient, they’re best for quick edits — not for professional results.
If you care about preserving layout quality, adjusting transparency, or editing multiple images, the PDFgear app or its online editor gives you far more control, with zero restrictions.
Add Images to PDF with Adobe Acrobat (Free and Paid Versions)
Many guides mention Adobe Acrobat first — it’s the most well-known PDF tool, and it does include image insertion features. However, the method differs between the free Acrobat Reader and the paid Acrobat Pro. Let’s look at both, starting with the free version most users have installed.
Using Free Adobe Acrobat Reader
You can insert an image into your PDF using the Add a Stamp tool. It’s a creative workaround, since Acrobat Reader doesn’t have a direct “Add Image” button like the paid version.
Steps:
1. Open your PDF in Adobe Acrobat Reader.
2. Go to the “All tools” sidebar and select “Add a Stamp”.
3. Copy your image first (for example, right-click an image file and choose Copy), then switch to Adobe Acrobat window and directly paste it on your PDF.
4. The image will appear on that page — you can move, resize, or adjust its opacity in the right-click menu as needed.
5. Go to “File → Save” to apply your changes.
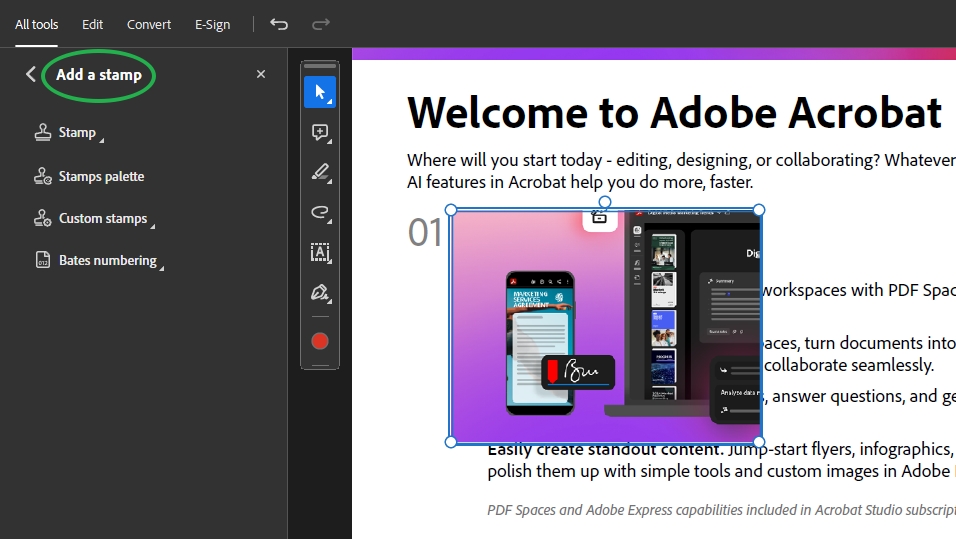
Add Photo to PDF with Adobe Acrobat
This method works for basic tasks like inserting a signature, logo, or small graphic — all without paying for Acrobat Pro. However, if you want to further edit the image after insertion—such as rotating, flipping, or replacing it with another image—you’ll need to use the dedicated “Add Image” button in the paid Adobe Acrobat Pro.
Alternatively, you can use the free PDFgear software, which supports Windows, Mac, iOS, and Android.
Using Adobe Acrobat Pro (Paid Version)
The paid version, Adobe Acrobat Pro DC, offers a more direct workflow.
You can go to “Tools → Edit PDF → Add Image”, then select your picture, drag to place it, and save — all with full editing and formatting control.
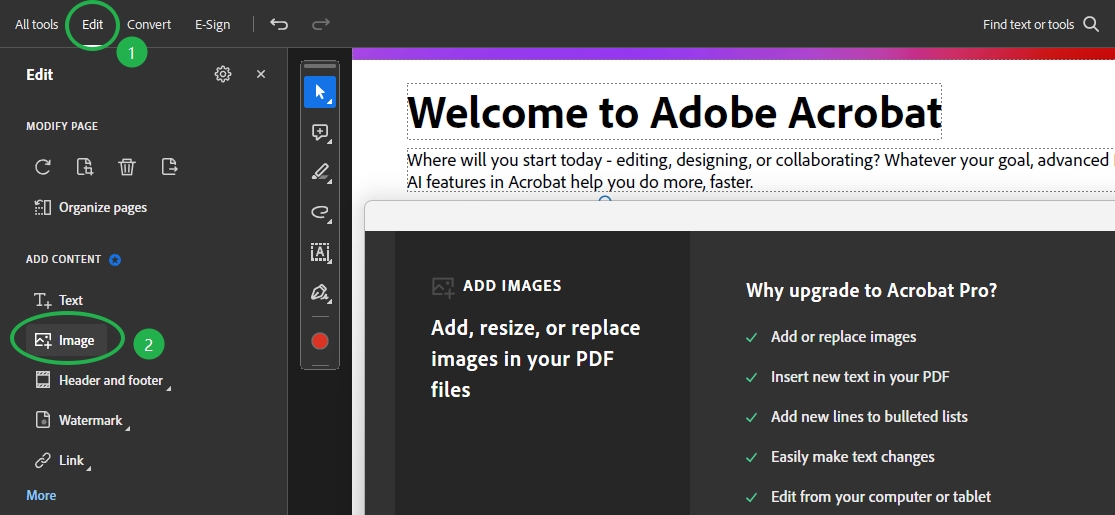
Add Picture to PDF with Adobe Acrobat Pro
Pros:
- Professional-grade precision and layout tools.
- Integrated within Adobe’s full suite of PDF features.
Cons:
- Requires a paid subscription and sign-in.
- Overkill if you only need to add one or two images.
If you’re trying to paste an image in Acrobat Reader and it doesn’t work, or you’re looking specifically for how to add an image to a PDF without Acrobat, try PDFgear Online PDF Editor for a smoother, fully free workflow.
Tips for Best Image Quality and Layout Preservation
Adding an image to a PDF is easy — but getting it to look clean and professional takes a few small adjustments.
Here are some quick, high-value tips to help your final file look as sharp as possible:
- Use high-resolution images (300 DPI or higher): Low-res images often appear pixelated once scaled in a PDF.
- Choose PNG format for transparency: PNG files keep clear edges and are perfect for logos or watermarks.
- Lock the aspect ratio while resizing: This prevents distortion or stretching.
- Set light opacity (50–70%) for logos: Creates a subtle, professional look without overpowering text.
- Save with embedded fonts: This avoids layout shifts when your PDF is opened on another device.
- Use the PDFgear app for private files: Since everything runs locally, it’s the safest choice for confidential or offline work.
FAQs: Fixing Common Image-to-PDF Issues
Even with the right tools, a few questions come up often when working with images in PDFs. Here are quick answers to help you solve the most common issues:
How to add an image to a PDF without using Adobe Acrobat?
You don’t need Adobe Acrobat to insert images into a PDF. The free PDFgear Online PDF Editor lets you upload your file, go to Add Image, and insert your image directly — all from your browser.
You can also use the PDFgear software on Windows, Mac, iPhone, or Android to add and replace images offline, completely free and watermark-free.
Can I insert multiple images into one PDF?
Absolutely. Both PDFgear Online and the PDFgear app let you repeat the same steps for each image — simply upload, place, and save.
For consistent design, align and size your images before saving.
How can I add a cover image to a PDF file?
If you want to set a cover image — for example, a book cover or a report front page — you can:
1. Visit PDFgear’s Online Page Adder and drop your PDF file.
2. Click “Select a file” to import your cover image.
3. Set the image page as the first page.
4. Click the “Export Now” button to download it.
Can I add a transparent image to a PDF?
Yes, but only some tools allow it.
In PDFgear’s online editor, upload your image through
Add Image”, then use the opacity slider to make it semi-transparent. This is great for subtle watermarks or logos.
Why does my image look blurry or low quality after adding it to a PDF?
Blurriness usually comes from inserting a low-resolution image.
Make sure your image is 300 DPI or higher, and always insert it as a PNG instead of a compressed JPG.
In PDFgear, you can also zoom in before saving — if the image looks sharp at 200%, it’ll print cleanly.
How do I keep the layout looking the same when adding images?
Always use a professional PDF editor (like PDFgear) that preserves layout integrity.
Avoid converting the file through Word or other tools, since that often reflows text and changes margins.
Embedding fonts before saving also prevents unwanted text shifts.
Conclusion: A Smarter, Simpler Way to Add Images to PDFs
Adding an image to a PDF shouldn’t feel like a technical task — and with the right tool, it doesn’t have to be.
Whether you’re placing a signature, logo, or photo, PDFgear gives you two clean ways to do it:
- Online, for quick edits with transparency control.
- Offline, through the PDFgear app, for full privacy and stability.
Both are completely free, watermark-free, and beginner-friendly — so you can focus on your document, not the tool.