How to Scan to Chromebook [The Ultimate Guide]

Summary :
Discover three efficient ways to scan to your Chromebook for file management and editing. Whether you’re using an external scanner or the built-in scanning feature, these methods will streamline your document workflow.
Table of Contents
How to Scan to Chromebook
Being affordable for many, Chromebooks have gained popularity among students. Scanning documents to your Chromebook is a great option when you want to digitize books or assignments for better storage.
However, unlike Windows and Mac, there’s less information available on how to do this with Chromebooks, and much of it is outdated. Don’t worry. We have the latest methods to help you quickly and effectively scan documents to a Chromebook with a scanner or the laptop’s built-in camera.
How to Scan to Chromebook with a Scanner/Printer
A scanner printer in your school or home will greatly raise the digitized file quality when scanning a document to phones or laptops.
Professional scanners like HP, Epson, and Canon provide comprehensive scanning features, including high-resolution and automatic duplex scanning. Meanwhile, these scanners support Wi-Fi connection, making them more compatible with diverse PCs.
Here’s how you can scan to Chromebook with a scanner:
Step 1. Power on the scanner and the Chromebook. Connect them via Wi-Fi or USB.
Step 2. Click the time in the bottom right corner of the laptop’s screen. Scroll down and click “Advanced.” In “Print and scan,” select Scan. (Alternatively, open the Launcher and type Scan in the search bar to find the app.)
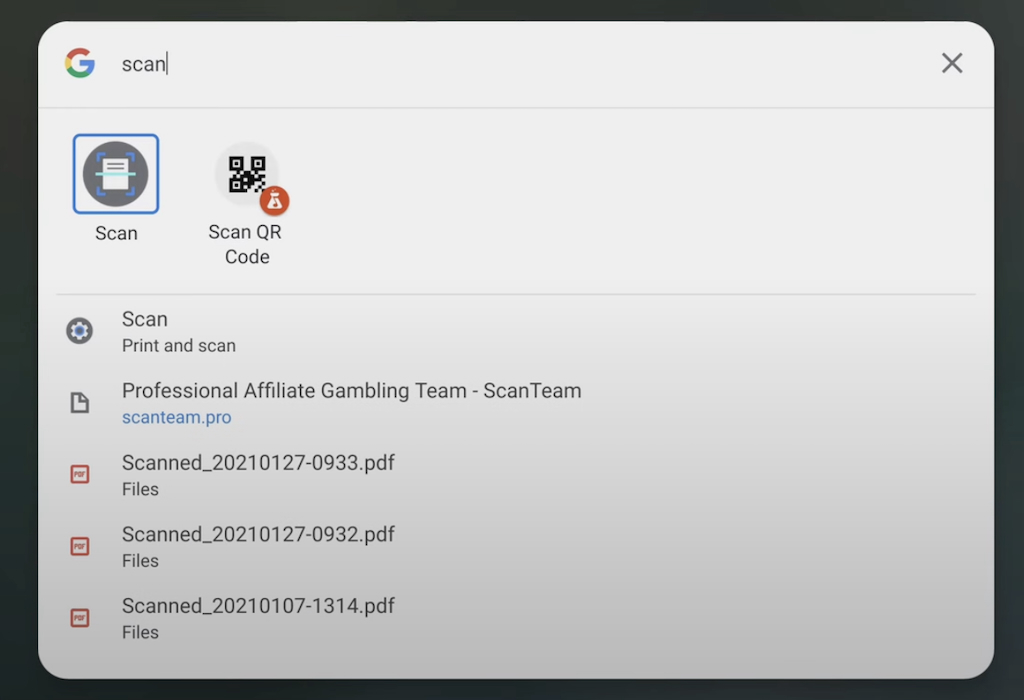
Find Scan Feature in Chromebook
Step 3. In Scan, click the drop-down menus to choose a scanner, file type, and file save location. Under “More settings,” you can adjust the options for color mode, page size, resolution, and more.
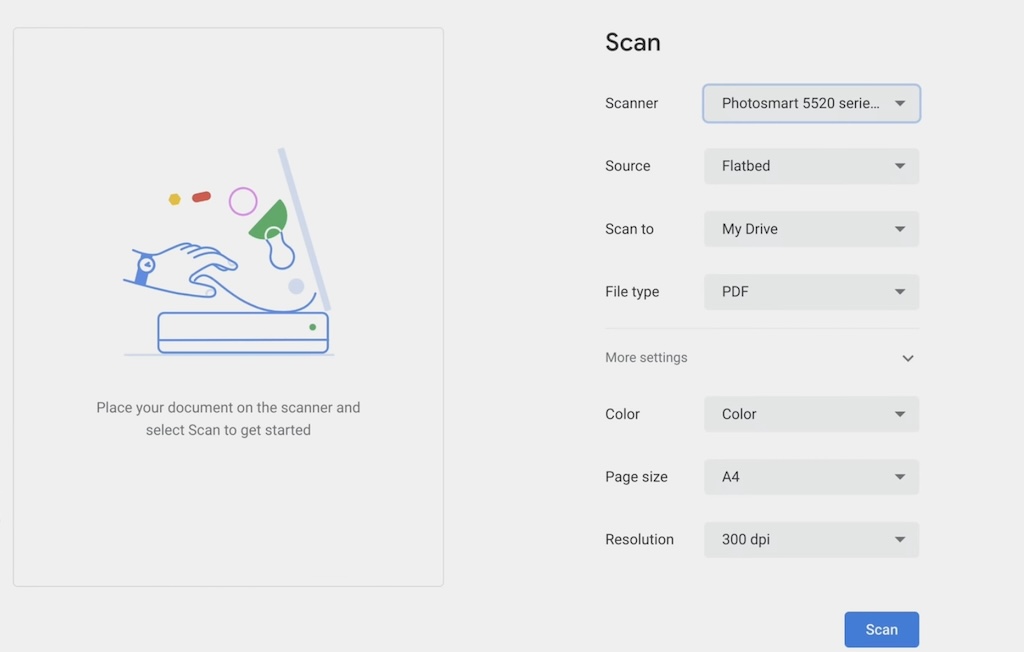
Adjust Settings in Chromebook Scan
Step 4. Click Scan to start scanning your document. For multiple-page scanning, place one more page on the scanner and press “scan page 2” and so on.
Step 5. After scanning, press the “End & Save” button and these pages will be saved to one file.
A scanner will give you clear scans of documents on your Chromebook but don’t fret if you don’t have one.
How to Scan to Chromebook with the Native Camera App
Maybe you’re working away from home with just your laptop, or you don’t have a printer or scanner. In such cases, scanning documents directly with your laptop’s camera app can be a practical solution. Chromebooks come with built-in scanning capabilities that let you use a webcam to capture and digitize documents.
Step 1. Find the Camera app in the launcher of the Chromebook and open it.
Step 2. Tap the Scan feature below the window, and two modes will show up, choose the Document mode.
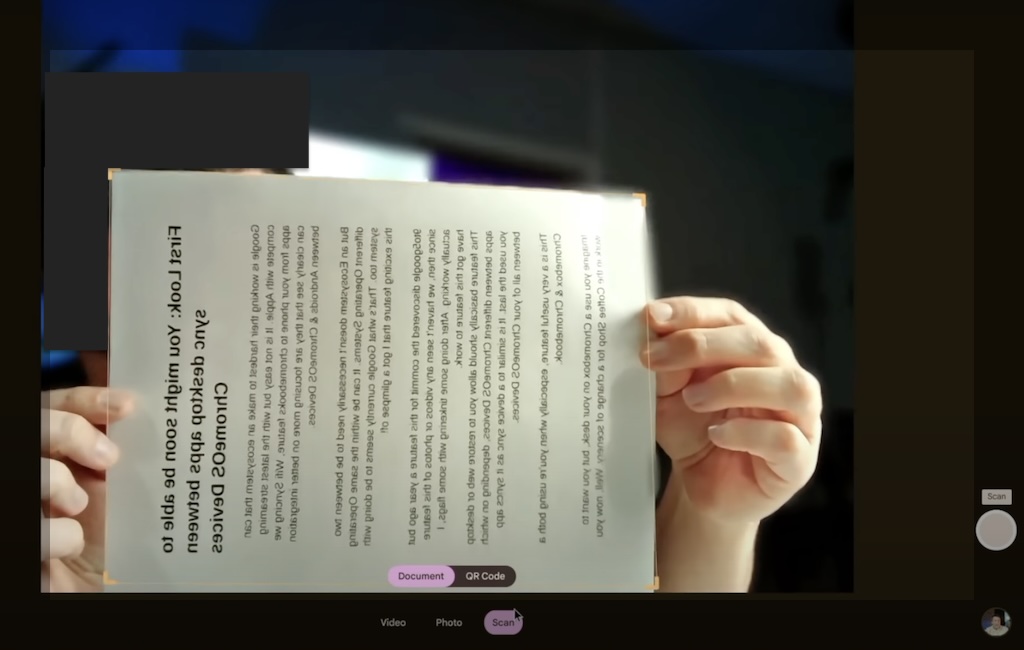
Choose Document Mode for Scan
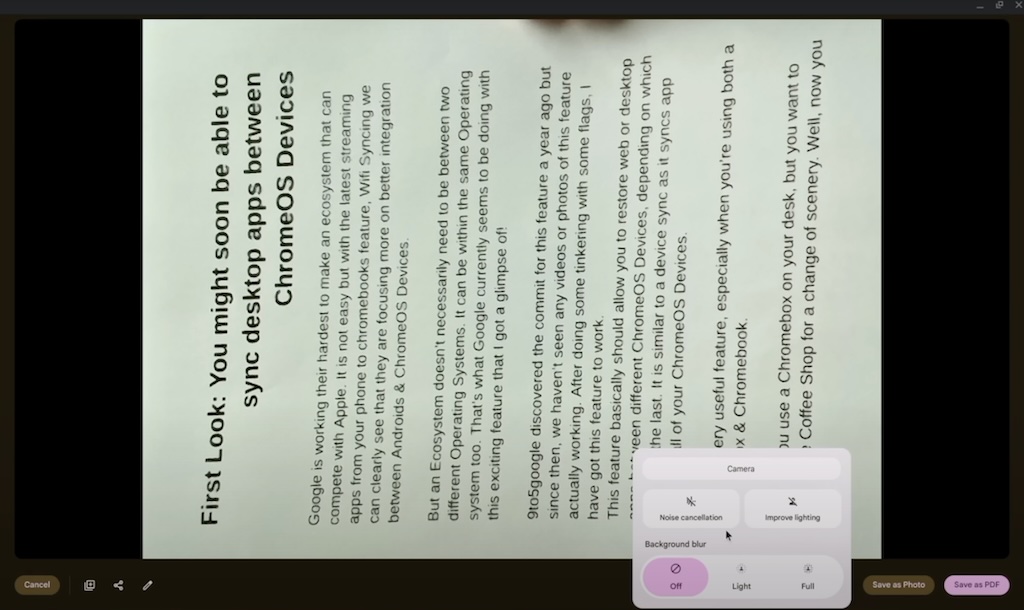
Step 3. Place your document in front of the webcam, and ensure proper lighting and angle. The Chromebook will automatically recognize the document. Click the shutter button on the right side to capture the scan.
Step 4. Click “Save as photo” or “Save as PDF” to decide the format of the scanned document. It’s recommended to save the file as a PDF for easier editing and sharing.
Save the Scanned File as PDF
Please note: The quality of the scanned file depends significantly on the webcam and the environment. Make sure to use a high-quality webcam and ensure proper lighting for the best results.
How to Scan to Chromebook with Adobe Acrobat
Google Drive, a cloud-based storage service developed by Google, enables scanning documents directly to its service or Chromebook. It offers better compatibility than other third-party software.
With professional scanning features, Google Drive lets you mirror scans and adjust the document capture area, making it ideal for document management.
Step 1. Download and install Google Drive on your Chromebook. You can obtain it on Google Play. Then, launch it on your laptop.
Step 2. Sign in to Google Drive with your email. Press the Plus + button and choose Scan. In the pop-up window, click Allow to enable Drive to take pics or record videos.
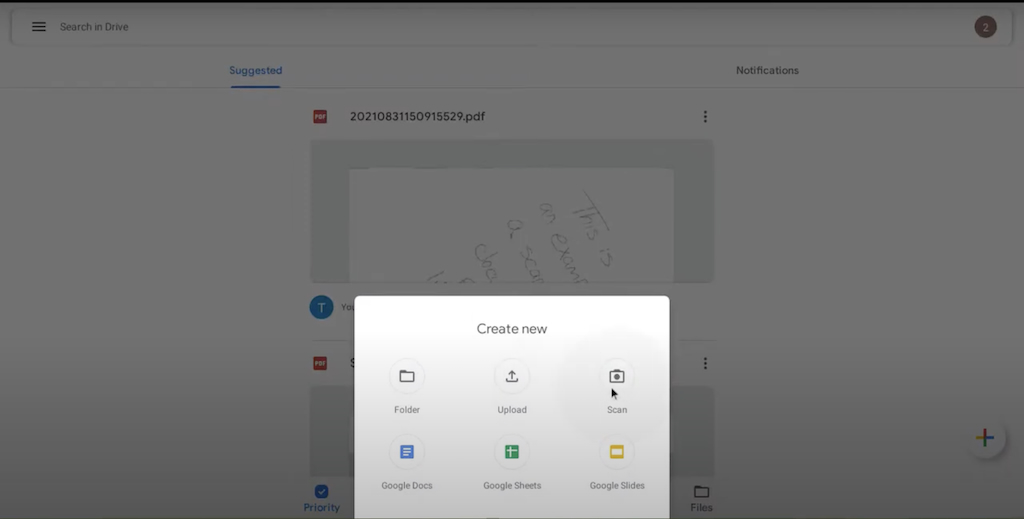
Choose Scan in Google Drive
Step 3. Place the document in front of the Chromebook’s camera, and ensure proper lighting and position of the papers. Use the mirror feature or keyboard camera feature on the left side if necessary.
Step 4. Tap the shutter button on the right side to capture the scan and tap the checkmark to confirm the capture. The scanned file is automatically saved in PDF.
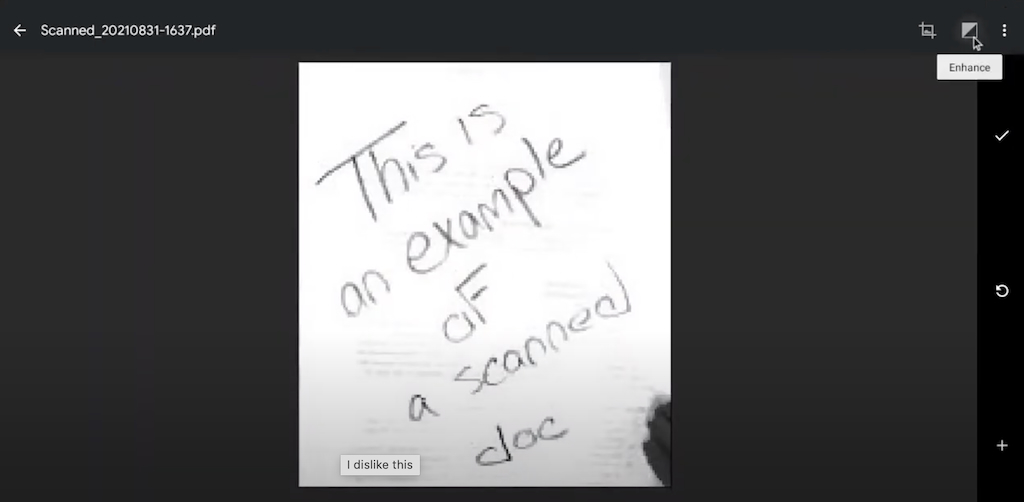
Confirm the Scanned Document
Beyond document scan, Google Drive allows you to edit the scanned PDFs, making it effortless to crop, rotate, and enhance the scanned PDF.
FAQs
Can I scan multiple pages into one PDF on a Chromebook?
Yes. As mentioned in this post, Chromebook’s scanner feature supports scanning multiple pages into one PDF. Simply connect a printer or scanner to your Chromebook, start scanning, and press the “scan page 2” option for more page scanning.
What is the best resolution setting for scanning documents on a Chromebook?
The best resolution for scanning documents is based on the type and size of the documents. It is suggested to set 300 DPI for text scanning, and for higher file quality, you can set it to 600 DPI or higher.
Can I scan directly to cloud services from my Chromebook?
Yes, you can scan directly to cloud services from your Chromebook. Use the native Scan feature to save scans to Google Drive or other cloud storage services like Dropbox or OneDrive.