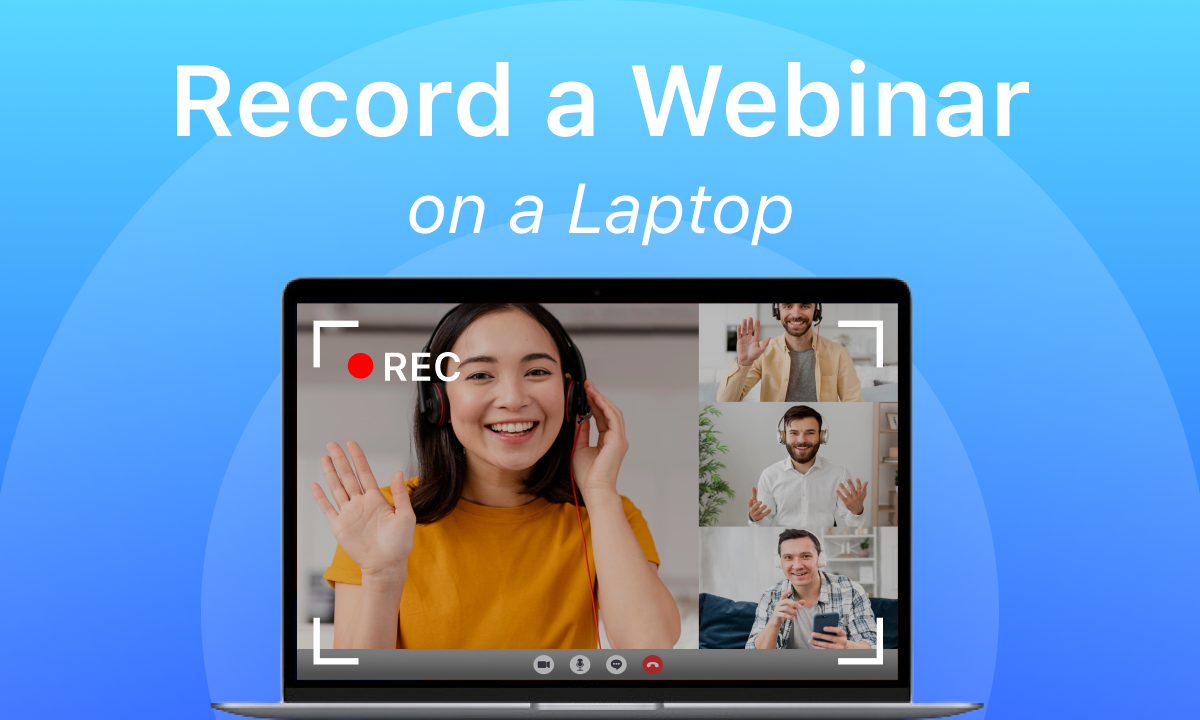
How to Record a Webinar on a Laptop at High Quality

Summary :
Master the art of webinar recording on your laptop with these free, step-by-step methods. Whether you use Windows, macOS, or ChromeOS, never miss a crucial moment again.
Table of Contents
How to Record a Webinar on a Laptop
Picture this: you’re attending an important webinar packed with valuable insights, and an interruption causes you to miss critical points.
Recording webinars can save the day by capturing every detail, so you can revisit the content even after a long time.
In this post, we’ll show you how to record a webinar on a laptop, covering popular systems operating systems. You’ll discover effective and comprehensive methods to ensure you never miss a moment again.
How to Record a Webinar on a Laptop Powered by Windows with Xbox Game Bar
Popular software like Zoom and Microsoft Teams usually have built-in recording features. But if the software you’re using doesn’t, you can use your laptop’s built-in screen recording or third-party software to get the job done.
For Windows users, the Xbox Game Bar is sufficient for recording webinars. This pre-installed software allows recording in the background, letting you stay focused on the key points of the presentation.
Follow the steps below and let’s get started.
Step 1. Launch Xbox Game Bar by pressing Win +G or clicking Xbox Game Bar in the search box on the taskbar.
Step 2. Before recording, set preferences about audio or video options in Settings > Widgets.
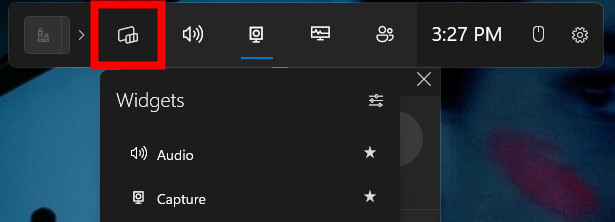
Open Xbox Game Bar Widgets
Step 3. Click on the camera icon in the toolbar to open it > Click the “Record” button or press Win + Alt + R to start recording. A recording bar will appear, showing that the recording is in progress.
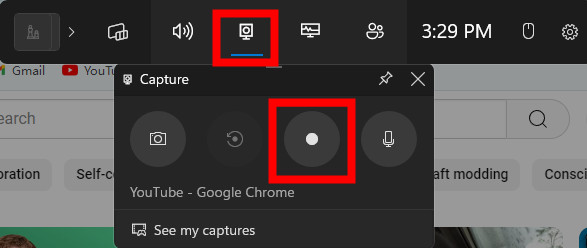
Start Screen Recording in Xbox Game Bar
Step 4. To stop recording, click the “Stop” button (a square icon) on the floating toolbar or press Win + Alt + R again.
The video is now saved in MP4 format on your laptop.
Xbox Game Bar is initially designed to record video games, it meets only basic screen recording demands. If you are looking for advanced recording functions like recording only a part of the screen or making annotations in the recording, consider third-party software like OBS Studio or Camtasia.
How to Record a Webinar on a Laptop Powered by macOS with QuickTime Player
QuickTime Player is a pre-installed multimedia app on MacBook and iMac. Benefiting from its intuitive UI, users can record screens at high quality straightforwardly.
This tool now supports recording audio and screen separately, and a feature for screenshots during the recording so you can capture key moments.
Take a look at the detailed steps for screen recording with QuickTime:
Step 1. Search “QuickTime Player” in Launchpad > Click “File” in the menu bar and select “New Screen Recording” from the drop-down menu.
Or use the shortcut Shift + Command + 5 to open QuickTime Player.
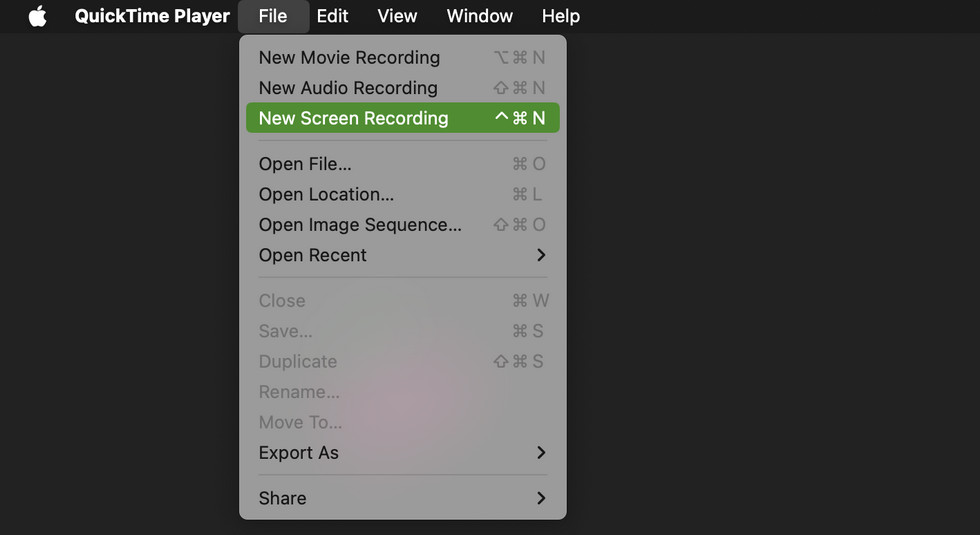
Launch QuickTime Player
Step 2. Before recording, click Option next to the record button to set audio input or show mouse clicks.
Step 3. Click anywhere on the screen to record the entire screen, or drag to select a specific area, then click “Record” to begin recording.
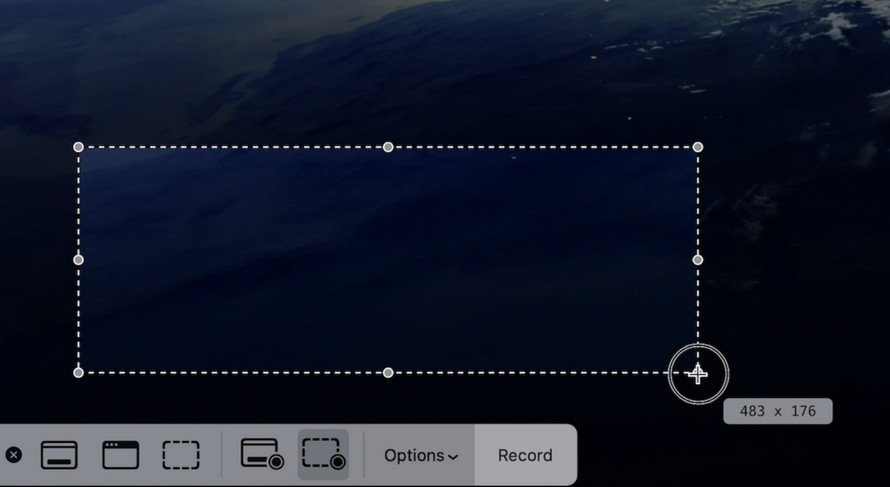
Select Area to Record
Step 4. Click the Stop button in the topmost menu bar or press Command + Control +Esc to end recording.
Step 5. After stopping, QuickTime Player will open the recording automatically so you can review it.
Although QuickTime Player is beginner-friendly, it lacks system sound recording capability. You can only capture both internal and external sound with a microphone.
An alternative Record Go is a handy tool to address this. It enables system audio and microphone sound capture to record both your sound and the host’s sound, or you can only record the system’s sound to avoid background noise.
Additionally, with Record Go, you can adjust the resolution and frame rate to make your video crystal clear for better presentations or lower the quality to save storage.
Record a Webinar on a Laptop Powered by Chrome OS with Its Built-in Recorder
While occupying a smaller market share, laptops powered by ChromOS still perform well when working through webinar recording.
Similarly, ChromeOS laptops come with a built-in screen recording feature that’s very easy to use.
Step 1. Press Shift + Control + Show Windows key to launch recorder, or click on the clock in the bottom-right corner of your screen to open the system tray, then click the screen capture tool (camera icon).
Step 2. Select the video camera icon to switch to video mode.

Switch to Video Mode
Step 3. Press the Settings button to adjust settings for audio input or camera footage adding.
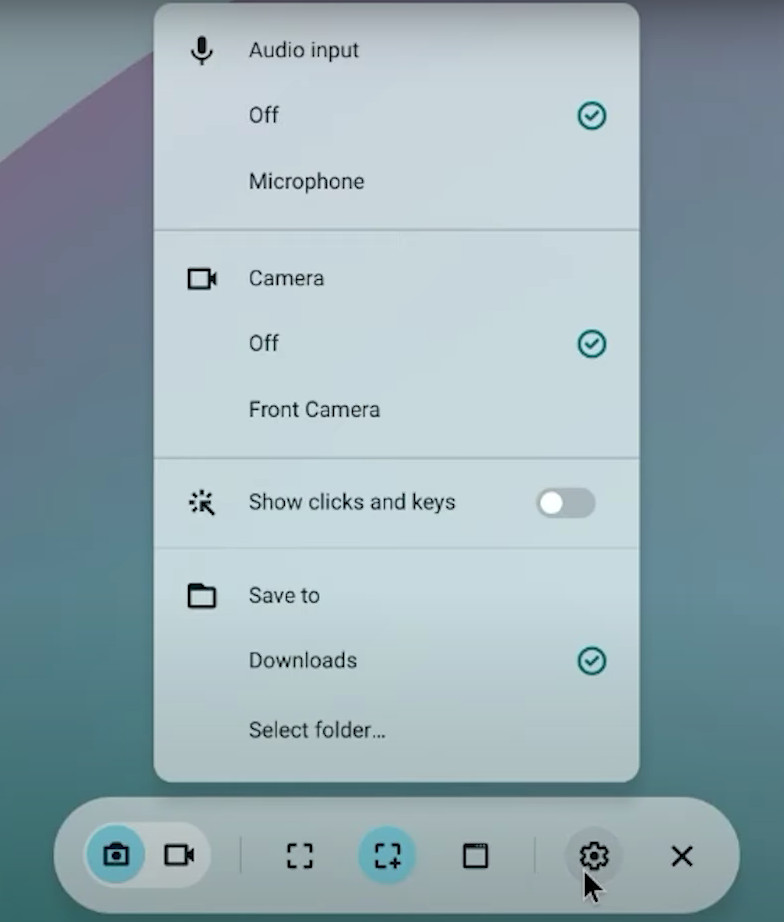
Adjust the Settings
Step 4. Click one of the three buttons in the middle of the menu to record the full screen, a specific window, or a custom area. Recording begins instantly after the selection.
Step 5. Click the stop button in the system tray when the webinar is over.
FAQs
What settings should I use to record a webinar?
For optimal video quality, it’s advised to record in full HD (1080p). Ensure that both system sounds and microphone are enabled for audio, and minimize background noise for clearer recordings.
Is it possible to record a webinar on an iOS device?
Yes. the iOS devices have a built-in tool to help record a webinar. Enable Screen Recording in Control Center in Settings > Swipe down from the top-right corner of your screen to open Control Center > Long press the recording button to enable the microphone > Tap the recording button to start recording.
Can I record a webinar using Zoom?
Yes, Zoom has a built-in feature for you to record webinars directly. Simply click the “Record” button at the bottom of the meeting window, and choose to save the recording locally or in the cloud.