How to Convert Picture to PDF on iPhone for Free

Summary :
Learn how to easily turn pictures into PDFs on your iPhone or iPad.
Table of Contents
Bundling your photos into a clean PDF makes sharing fast and hassle-free. iPhones do offer built-in ways to save images as a PDF, but they can feel limiting. In this guide, you’ll learn the free iOS method, plus a more flexible option with PDFgear.
Next, let’s start with the fastest online method without a login below.
Fastest Way: Convert Picture to PDF on iPhone
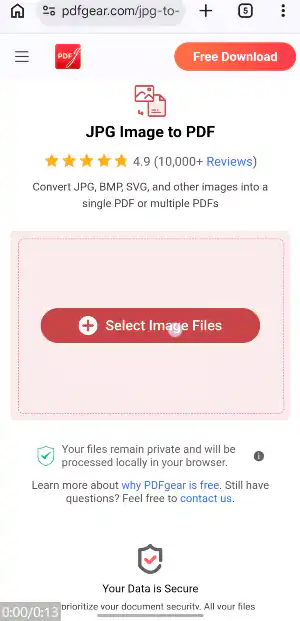
1. Open PDFgear Online JPG to PDF Converter on your iPhone.
2. Tap the Select Image Files button and choose your pictures.
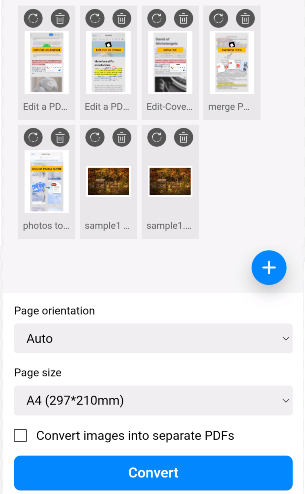
3. Preview the images and adjust their order.
4. Convert them into a PDF and download the PDF.
Privacy note: Conversion happens locally in your browser, so your files never leave your device.
For homework submissions, client documents, receipts, or scanned work files, try the PDFgear for iOS app to edit, sign, compress, rearrange, and manage your PDF after conversion.
How to Convert Picture to PDF on iPhone
Detailed Guide: Convert Picture to PDF Online for Free
The quick steps above show the fastest way to convert pictures to PDF online. If you want to adjust the file before saving it, PDFgear also gives you more control in the same workflow.
With PDFgear’s free online converter, you can turn iPhone pictures into a clean PDF in seconds. There is no cost, no app download, no sign-up, and no watermark.
What makes PDFgear different is its client-side processing technology. All file operations happen locally within your browser, which means your images never leave your device. This ensures complete privacy and security.
You can also rotate, rearrange, add, and delete images before conversion for a fully customized PDF.
Here is how simple it is:
1. Go to PDFgear’s image to PDF online converter, tap Select Image Files, and choose the images you want to convert.
2. Use the icons on each image to rotate or delete it.
3. Select your preferred page orientation and size, and check Convert images into separate PDFs if you want multiple files.
4. Tap Convert to start the process.
5. After a few seconds, tap Download File to save your PDF.
Convert Picture to PDF iPhone
How to Convert Image to PDF with PDFgear’s Free iOS App
The online converter may not work optimally with very large images or when converting dozens of files at once. In such cases, it is recommended to use the PDFgear iOS app for a faster and more stable experience.
The app works entirely offline, processing everything locally, and produces crisp, high-resolution PDFs every time. Its intuitive interface provides precise image controls, letting you customize image order and orientation with ease.

How to use the PDFgear app:
1. Download and install PDFgear app from the Apple App store.
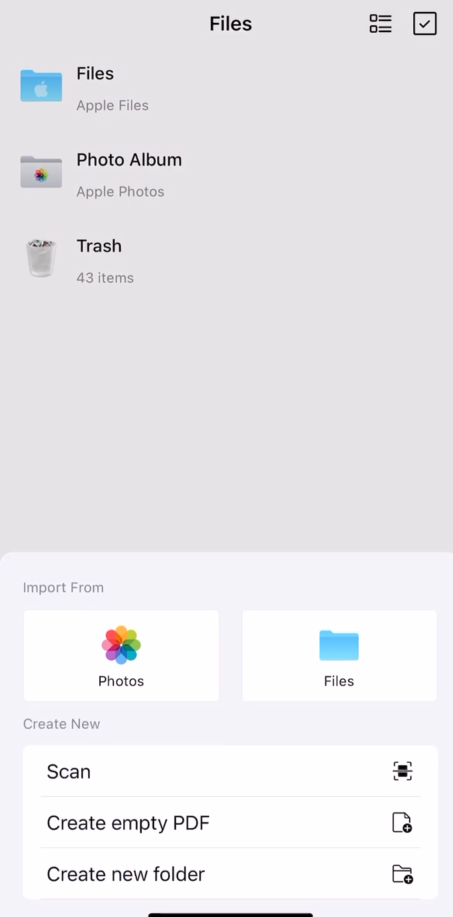
2. Tap the Plus button in the lower-right corner, then choose the images from Photos or Files, and tap Add.
3. Select the desired pictures, tap Add in the top-right corner, then tap Convert to PDF in the pop-up dialog.
4. On the Convert to PDF screen, drag and drop the pictures to reorder them, and use the rotate buttons to adjust orientation if needed.
5. Choose your preferred page size and orientation. If you want to merge all images into one file, select Combine images into one PDF, then tap Convert to start the process.
6. Within seconds, your converted PDF will appear in PDFgear. You can then view, save, or share it directly from the app.
Picture to PDF in PDFgear App
Whether you are converting photos, scanned documents, or screenshots, PDFgear makes the process smooth and secure while offering clear advantages over online converters.
The app also allows you to instantly edit or markup the converted PDF, making it easy to add notes, highlights, or annotations without needing another tool.
How to Convert Image to PDF on iPhone in Photos App
If you prefer a built-in method, you can use the Share feature in the Photos app to print images into a PDF. You can define the order by selecting images accordingly and use the built-in editing tools to rotate or mark up images before conversion.
Steps:
1. Open Photos, tap Select, and choose the images.
2. Tap the bottom-left Share button, scroll down, and tap Print.
3. On the print preview, use a two-finger pinch-out gesture to zoom in.
4. This creates a PDF preview. Tap Share and select Save to Files or send it to another app.
While this method is quick, it has several limitations. Images keep their original proportions, which often leads to mismatched page sizes and white margins. Any rotation must be done beforehand, and page order is locked to the order in which you select the images. Plus, the pinch-out gesture required to create the PDF is also unintuitive.
For a smoother, more customizable workflow, PDFgear is a smarter choice.
How to Convert Photo to PDF on iPhone in Files App
You can also use the Files app to create PDFs from images on your iPhone or iPad. This method generally produces higher-quality PDFs compared to the Photos app.
Steps:
1. If the images are not already in Files, save them from Photos by selecting Share → Save to Files.
2. Open Files, tap Browse, and locate your images.
3. Tap the triple dots icon in the top-right corner, tap Select, and select the images you need.
4. Tap the triple dots button in the lower-right corner, and tap Create PDF. The PDF will then be created in Files.
Although the Files app produces clean PDFs, it offers almost no customization. Images must be moved into Files first; they’re automatically arranged by filename, and you can’t rotate or reorder them.
If you want more control and a polished final PDF, PDFgear remains the superior option.
Summary: Why PDFgear Is Better
Compared to the built-in Photos and Files apps on iPhone, PDFgear delivers higher quality, greater flexibility, and a faster, more intuitive conversion experience.
Output Quality
PDFgear produces high-resolution, print-ready PDFs that preserve original image clarity. The Photos app may slightly compress images, while Files can vary in resolution.
Ease of Use
Converting images to PDF takes just a tap, with the entire process finished in seconds.
Layout Control
Reordering, rotating, and resizing images is simple, and you can choose page size and orientation without limitations.
Offline and Online Options
Whether you prefer a browser-based converter or a fully offline iOS app, you can work anywhere while keeping your files secure on your device.
Speed and Batch Conversion
Multiple images are processed quickly and without lag, unlike built-in methods that handle fewer files at once and require more manual steps.
In Summary
The Photos and Files apps are fine for simple conversions, but PDFgear offers superior quality, customization, and speed. It is the smarter choice for anyone who wants polished, professional PDFs with zero hassle.
FAQs
What is the best photo to PDF converter app for iPhone?
The best app is PDFgear. It is completely free, works offline, and converts photos to high-quality PDFs instantly. You can reorder, rotate, and combine images while keeping your files private and secure on your device.
How can I convert a picture to a PDF in iPhone Notes?
Open Notes, tap the Camera icon, then select Scan Documents. Capture the image and save it. Tap the scanned page, select Share, and choose Save to Files to export it as a PDF.
How can I convert a picture to a PDF on an iPhone without an app?
You can use the built-in Photos or Files app. In Photos, tap Share, then Print, zoom out on the preview, and select Save to Files. In Files, long-press an image, go to Quick Actions, and choose Create PDF. PDFgear’s online converter also works without installation.
How to scan a photo into a PDF on an iPhone?
Use Notes (New Note → Camera → Scan Documents) or the PDFgear Scan app. PDFgear Scan offers higher clarity and allows offline PDF saving.
Can I convert HEIC or PNG images to PDF using PDFgear?
Yes. PDFgear supports HEIC, JPG, PNG, and other common formats, converting them into high-quality PDFs automatically.
Is PDFgear really free?
Yes. Both the PDFgear app and the online converter are completely free to use with no watermarks, sign-ups, or hidden fees.
To Sum Up
The built-in Photos and Files apps on iPhone can convert pictures to PDFs quickly, but they come with limitations such as fixed page order, margins, and less flexibility.
With PDFgear, you can skip those restrictions. Whether you use the free online converter or the PDFgear PDF Converter mobile app, you will get a powerful, customizable, and secure experience. You can rotate and rearrange images, merge multiple pictures into a polished PDF, or convert between different document formats at no cost.
Experience the difference today. Try the PDFgear Online Converter or download the PDFgear mobile app from the App Store for free.