How to Fill Out a PDF on iPhone with 5 Free Methods

Summary :
Learn about 5 free and easy methods to fill out and sign on PDF forms on iPhone, whether it’s already on your device, or sent by others in email.
Table of Contents
Fill Out a PDF on iPhone Using a Free App
PDFgear offers a dedicated free mobile app that helps you fill out & sign on PDF forms effortlessly on iPhone and iPad, whether the PDF file is fillable or not.
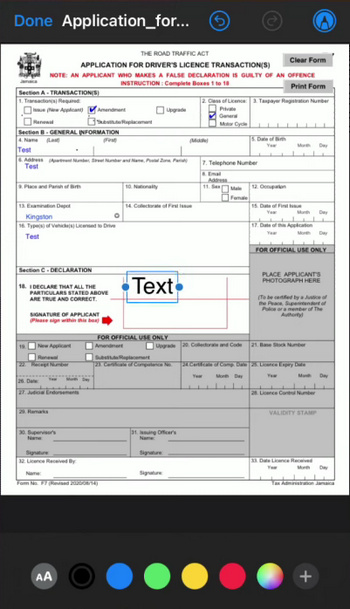
*Prior to starting, make sure the PDF form you need to fill out is saved in the Files app.
Video Tutorial

Step 1. Download and install the PDFgear iOS app from the Apple App Store. Open PDFgear, and tap on the Plus icon to import and open the PDF form on your device.
Import PDF
Step 2. Tap on the Edit button from the upper-right corner, and switch the editing option to Fill & Sign in the upper box.
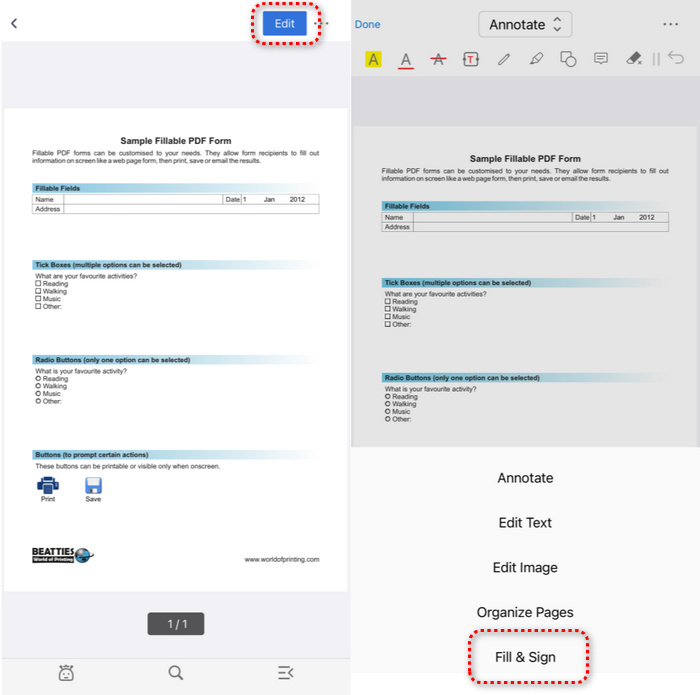
Go to Fill & Sign
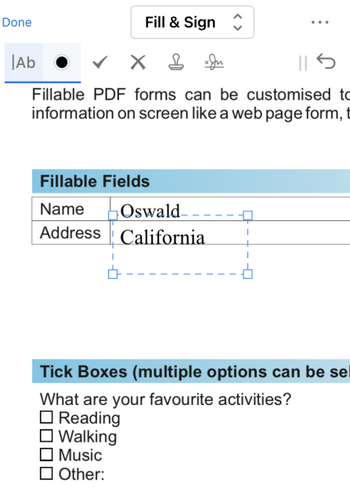
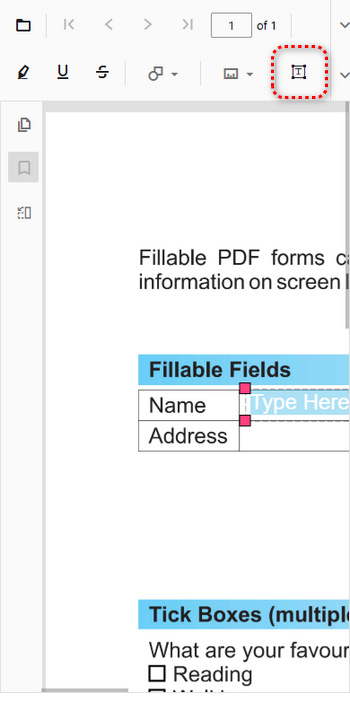
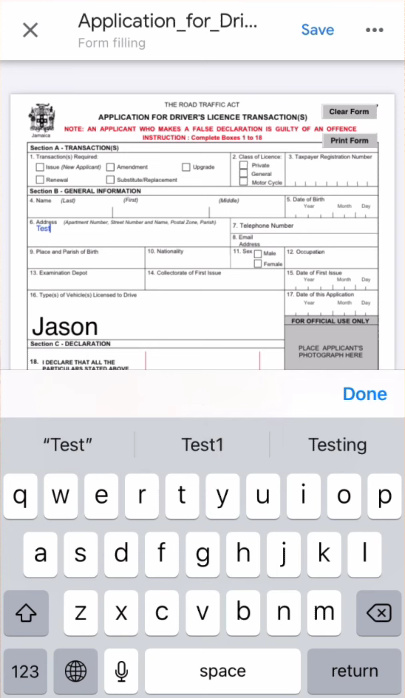
Step 3. Tap on the existing form field, when the text cursor appears, type in the text to fill in the area.

Type to Fill
Step 4. If the PDF form fields are not interactive, that means the PDF is non-fillable, but you can still fill it with PDFgear.
Select the text tool on the left side of the upper ribbon, and tap on the empty form field where you need to fill it out. Then type in the text to fill in the textbox.
Fill Out PDF Form in PDFgear App
Step 5. If needed, tap on the added text box and hit Properties, then you’ll be able to change the size and color of the inserted text.
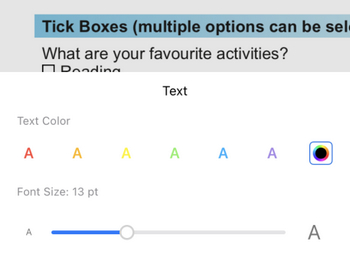
Change Text Size and Color
Step 6. Once you are done filling out the form, tap on the signature button from the upper ribbon, which allows you to create a signature by typing, drawing, or gallery images.
Select a created signature and tap on a PDF page to insert it there.

Sign on Filled PDF
Step 7. Lastly, click the Done button from the upper-left corner, then tap on the triple dots icon from the upper-right side to save or share the edited PDF form.
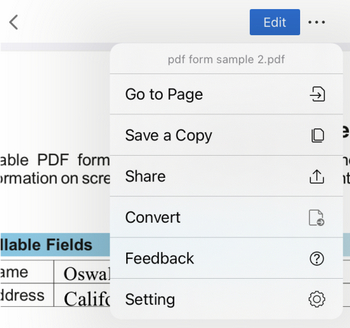
Save and Share the PDF Form
Fill Out a PDF on iPhone Online for Free
If you want to fill out a PDF on iPhone/iPad without app installation, PDFgear also helps with that.
PDFgear PDF form filler allows you to fill out and sign on a PDF online in a web browser. It’s free, there’s no signup, and there’s no watermark.
Step 1. Go to PDFgear online PDF form filler, and click Select PDF file to open the PDF you need to fill out.

Select PDF File
Step 2. Tap on the interactive form fields, when the text cursor appears, you can type in text to fill in the area.

Tap and Fill
Step 3. If the form fields are not interactive upon tapping, that means the form is non-fillable.
To fill in a non-fillable form with PDFgear, tap on the textbox icon in the upper menu bar, and tap on the form field to insert a text box there. Then double tap on the inserted text box and type in text to fill in the form area.
Fill with Textbox
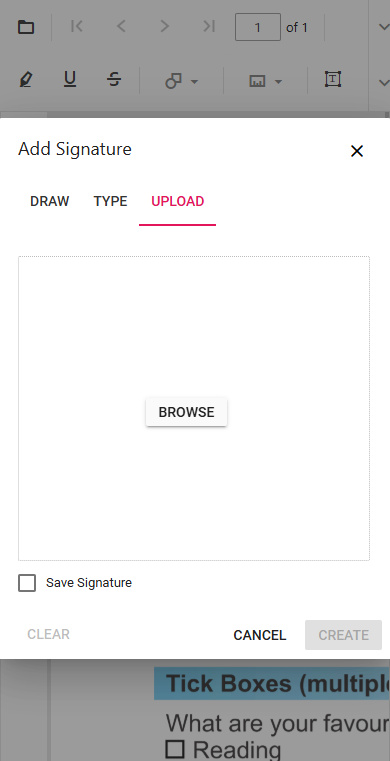
Step 4. If you need to sign on the completed form, tap on the second dropdown menu in the upper-right corner to select the signature tool.

Go to Signature
Step 5. Draw your signature, type in text, or upload an image to create your own signature. Tap CREATE and tap on the PDF to sign the form with it.
Sign on PDF Form
Step 6. Lastly, tap on the dropdown menu in the upper-right corner, and tap Print or Download to respectively save a non-fillable or fillable version of the PDF form.

Save Form
Fill Out a PDF that was Sent to You on iPhone in Files App
The general method to fill out our PDF forms that are sent by others in emails like Gmail is to save them to Files and then use the Files markup features.
Step 1. If your PDF form is sent by others through email, open the Email app and open the PDF in the attachment. Then tap on the Share button below and select Save to Files.
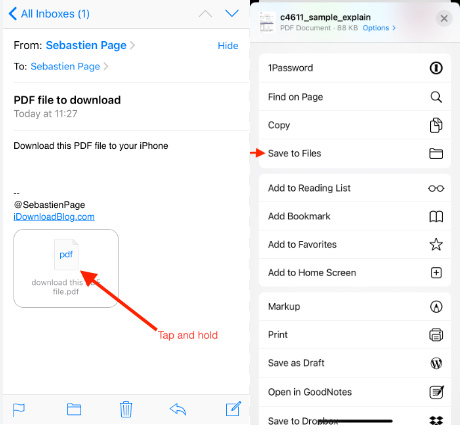
Save Attachment to Files
Step 2. Go to the Files app, click the PDF file we just saved there, and click the top-right Pencil icon to access the markup tool.

Open PDF in Files
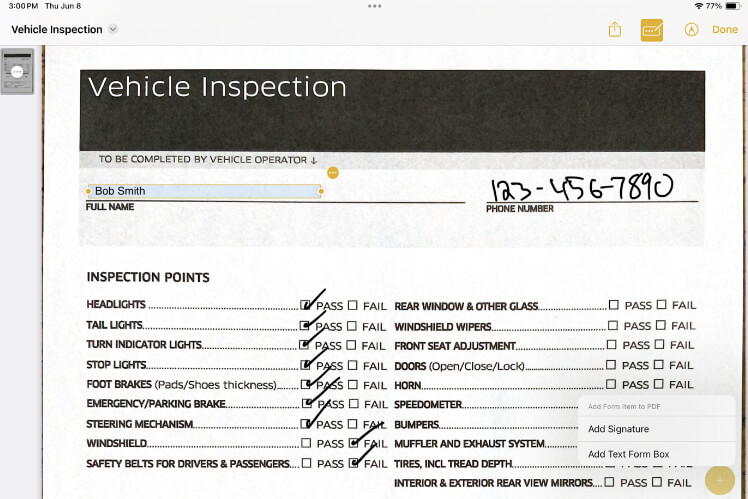
Step 3. Tap on the lower-right Plus icon, and select Text from the pop-up menu to add text boxes.
Add Text Boxes
Step 4. Drag and drop the text boxes to the needed form fields, and type in the text to fill out the form.
Fill the Form
Fill Out a PDF on iPhone Using Google Drive
If you’ve just received a PDF form in Gmail, you can intuitively fill it out in Google Drive, which also offers basic PDF form-filling features. However, it only works with editable PDFs.
*If you haven’t already, you’ll need a Google account and the Google Drive app installed on your iPhone/iPad.
Step 1. If you haven’t uploaded the PDF to Google Drive, open the Google Drive app, tap the lower Plus icon, and choose Upload.
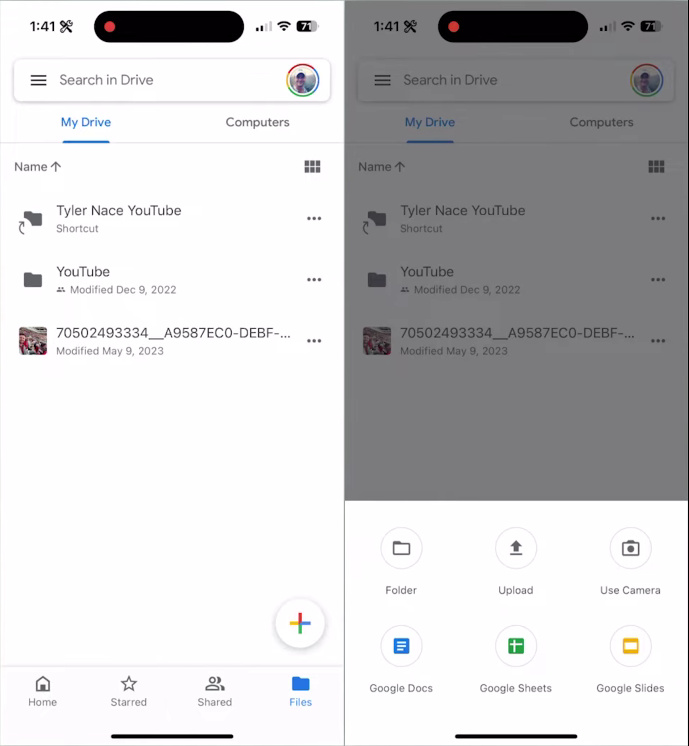
Upload PDF
Step 2. Select the file, and click on the Fill Out form. If you find the option for editing is not available, the file is not editable. In that case, you’ll need to manually insert fillable form fields.

Tap Fill in Form
Step 3. Tap on the relevant sections and fill out the details by typing. Tap Done to insert the text, and tap Save to save the form.
Type in
Automatically Fill Out PDFs Using Apple AutoFill
Apple introduced the AI-enabled Auto Fill feature on iOS 17, iPadOS 17, and macOS Sonoma, it allows you to fill out PDF forms automatically.
You will need to enable AutoFill Settings on your iPhone. Go to Settings > Safari > AutoFill > turn on the Use Contact Info and Credit Cards toggle. However, the app does not work with every editable field. It will auto-fill only those regions that are auto-saved.
Apple Autofill Feature
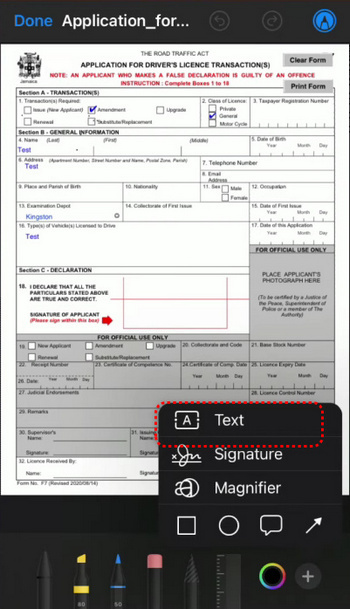
1. You can simply locate the PDF file saved on your phone and open it.
2. Under ideal conditions, the file should be located in the Files app.
3. Tap on Fill located at the bottom right. Now, tap the cell that you want to fill in the details with.
4. The details including your contact, address, phone number, etc. should appear on your Suggestion box.
5. You can simply tap on the relevant suggestions to enter them in the fields. Click on Done once you are done with the editing.
Conclusion
Filling out an editable PDF file is rather easy and simple if you follow the right steps and the right tools. However, we found the PDFgear iOS app to be the most straightforward and easier option to use. Check it out once and find the simple navigation and editing options that the tool offers on the go.