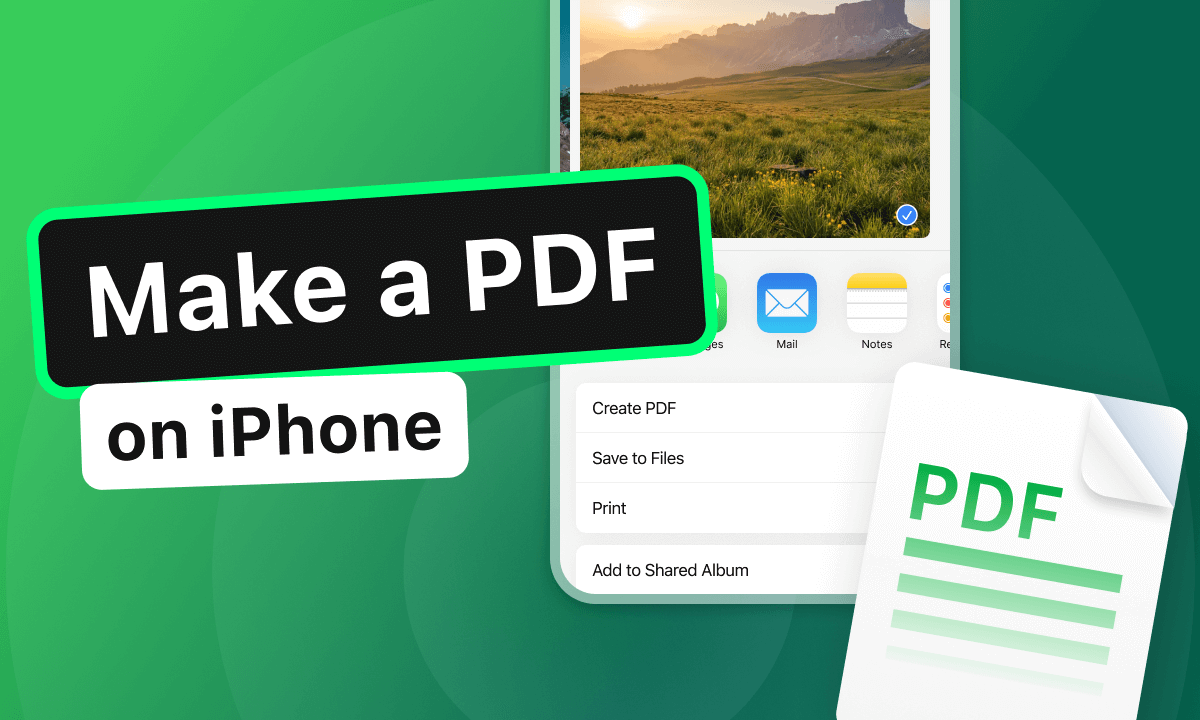
3 Free and Easy Methods to Make a PDF on iPhone in Less than 3 Minutes

Summary :
Check out step-by-step guide on how to make a PDF on iPhone and iPad using Photos app, Notes app, and an online PDF converter. You can make a PDF from photos, scans, and documents.
Table of Contents
How to Make a PDF on iPhone
While the majority of office workers are accustomed to making PDFs using desktop PDF editor software, the case is notably different if you’re about the make a PDF on mobile devices.
Luckily, Apple has made it easy to create PDF documents on iOS. On this page, 3 free and easy methods to make a PDF on iPhone and iPad are provided with step-by-step tutorials, and I’m sure there’s at least one method that works for your case.
Fast Check
✅Apple provides handy inbuilt options within Files, Photos, and Safari apps for you to make a PDF with gallery photos, images, and webpages.
Additionally, PDFgear provides various free online PDF converter tools to create PDFs from photos, images, MS Word, etc.
How to Make a PDF on iPhone in Photos App
The default gallery app Photos on iOS devices offers an inbuilt functionality to create PDFs by printing gallery photos, without drawing support from third-party services.
The printing will save your image as a flattened PDF document that has the look of a real document printout.
By using this method, you can easily save photos and screenshots on iPhone to PDF, without needing app installation or third-party services.
Step 1. Find and open the Photos app on your iPhone or iPad, and go to the Album with the image you want to use for creating PDFs.
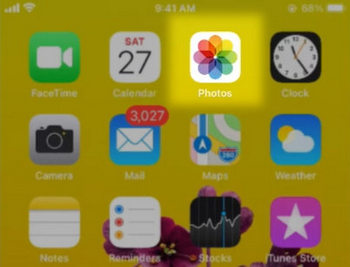
Launch the Photos App on iOS
Step 2. Tap and swipe to select the images that you intend to make a PDF with, and tap on the Share icon from the lower-left corner.
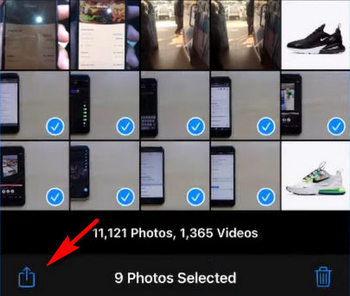
Select the Pictures You Intend to Make PDFs with
Step 3. Front the Printer options window, tap and hold the first image until you’re led to the large image preview screen.
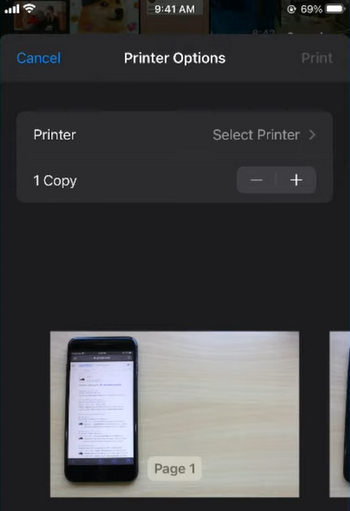
Preview Photos from Printer Options
Step 4. From the picture preview screen, tap on the Share icon from the upper-right corner, and from the sharing options, scroll to the Notes app.

Share Photo to Notes App
Step 5. In the upcoming window, give your new note (the created PDF file) a name, and hit Save to save the note create with images as .pdf file format in the Notes app.
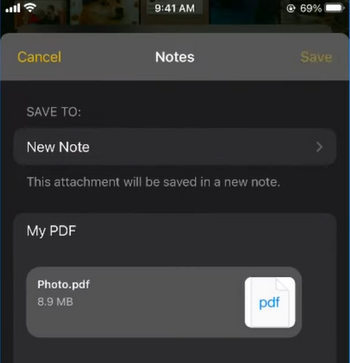
Name and Save the Photo-turned PDF
Step 6. To access the saved PDF document, simply go to the Notes app, and the image-turned PDF we just saved should appear at the top of the file list.
Tip: Note that this method will create one PDF document using multiple images. To create multiple PDFs, repeat the steps in the tutorial.
How to Make a PDF on iPhone Using the Notes App
The camera lens on your iPhone can be used to scan and make a PDF, and there are two common practices.
One is using one of the top free scanner apps for iPhones, many of which allow you to directly transform paper documents to digital PDFs.
Another method is using the built-in Notes app, which allows for the insertion of camera scanning, and then turns the note into a PDF file for sharing.
And in the following, we’ll demonstrate the Notes method, which allows you to make a PDF with iPhone camera.
Moreover, in certain cases, the scans are too large as a result of high DPI, and if you want to make a PDF in a smaller size, then you should totally check our guide on how to reduce the size of scanned documents.
Step 1. Open the Notes app on your iPhone, and tap on the Edit icon from the button right corner to create a new note.
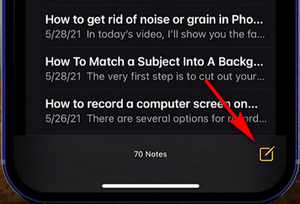
Create a New Note on iPhone
Step 2. Press the camera icon in the middle, and then select Scanned documents.
Add a Scanned Document in the Note
Step 3. Use your iPhone camera lens to scan the document you need to create a PDF for.
Step 4. Drag and drop the corner to adjust the scan, and hit Keep Scan to save the scan, and add it to your note.
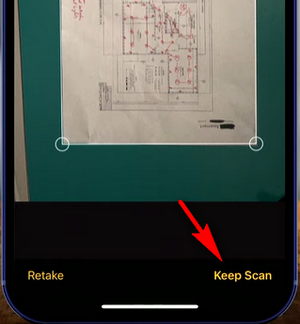
Adjust and Save the Scan in Notes
Step 5. Then you can conduct further adjustments to optimize the scanned PDF, such as rotating, color, texture, etc.
Step 6. When ready, hit Done from the upper-left corner. And hit Done from the upper-right side to finish editing your new note.
Step 7. Hit the triple dots icon from the upper-right corner, and select Send a Copy from the popup menu.
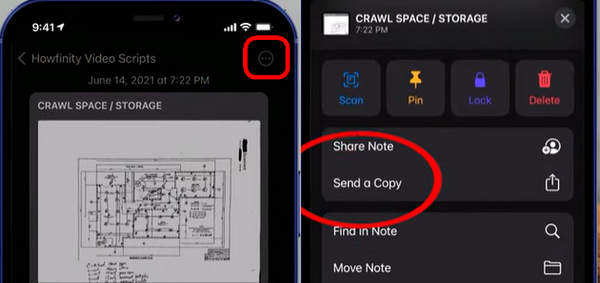
Send a Copy in Notes
Step 8. Lastly, Hit Mail or Print to export the new note. Either way, you’ll get a PDF version of the scanned document, just taken from your iPhone camera.
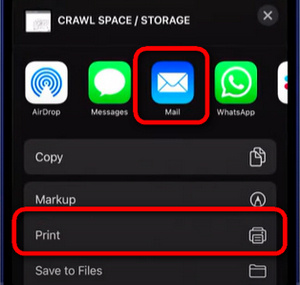
Save Scanned PDF in Notes
Notes app on iPhone allows you to make a PDF using three types of media: Scanned Documents, Library Photos, and Camera Photos. You just need to insert the corresponding material in Step 2.
How to Make a PDF on iPhone Online with PDFgear
Using an online image-to-PDF converter is undoubtedly the most convenient way of making and editing PDFs on iPhone, and PDFgear is one of the best of them, and it’s completely free to use.
PDFgear works on different versions of iOS of iPhones and iPads, and it offers one-click image/document to PDF conversions, making it an adequate HEIC to PDF converter.
For demonstration, the following tutorial will show you the 3 simple steps to make PDF on iPhone from photos and images. As mentioned, PDFgear allows you to create PDFs from plenty of file formats, so make sure to check the last part of this post for more information on this.
Note: Prior to starting, make sure the pictures you intend to create PDFs with are accessible from the File app on your iPhone.
Step 1. Go to PDFgear Online PDF Maker
Open a web browser application like Safari on your iPhone or iPad, and go to the PDFgear Online JPG to PDF Converter tool.
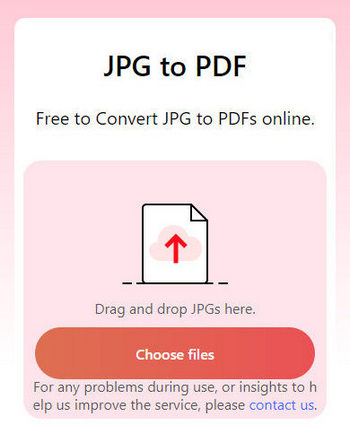
Go to PDFgear Online PDF Maker on iPhone
Step 2. Make PDFs from Pictures on iPhone
Tap on the Choose files button to upload the pictures you intend to make PDFs with, from your iPhone or iPad to PDFgear.
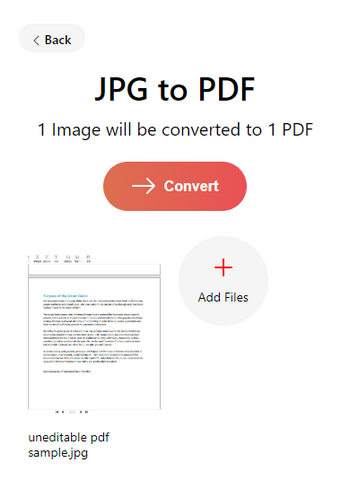
Upload Pictures to PDFgear from iPhone
Step 3. Download Created PDFs on iPhone
Your created PDF will be available for download in seconds, shown with file size. And if you find the output PDF too large, the PDFgear online PDF compressor tool helps to easily resize PDFs under 300kb.
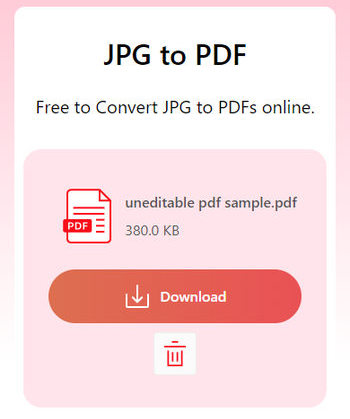
Download the PDFs You Made on iPhone
How to Make a PDF on iPhone from Email or Webpages
Make a PDF on iPhone from Email
Just like printing images to PDFs in the Photos app, you can easily save an Email as PDF on your iPhone as well:
1. Open an Email in the Mail app
2. Tap the More button at the bottom.
3. Scroll down and tap Print.
Make a PDF on iPhone from Webpage
And if you need to save a webpage to PDF on iPhone or iPad, the web browser app Safari also has the printer feature. You can either:
1. Save the webpage as a screenshot, and use Method 1 introduced above to save the webpage screenshot as a PDF in the Photos app.
2. Use the Share feature to save the webpage as a Full Page into the Library of Books app, which is then accessible as a PDF document.
For more details, please check our guide to saving a webpage to PDF on iPhone.
Make a PDF on iPhone from Word/Excel/PPT
The first tutorial in this post only shows you the process of creating PDFs on iPhones with images, but PDFgear.com does a lot more than that.
PDFgear is a comprehensive PDF converter tool that offers a complete set of PDF creator tools that allows you to make a PDF on iPhone from 60+ image and document file formats.
PDFgear is competent in making PDFs from JPG, PNG, HEIC, PPT, Word, Excel, and more. Yes, PDFgear also allows you to make PDF on iPhone with .docx documents, as it’s one of the best DOCX to PDF converters these days.
The followings are some most used examples of the usage of PDFgear.
1. Make a PDF on Your iPhone with Word Documents
1. Use a web browser on your iPhone like Safari and navigate to the PDFgear Online Word to PDF Converter tool.
2. Tap on the Choose files button to upload a Microsoft Word document to PDFgear from File Explorer on your iPhone.
3. The Microsoft Word file will be automatically converted to a PDF for you to download onto your iPhone.
2. Make a PDF on iPhone with Excel Spreadsheets
1. Use a web browser on your iPhone like Safari and navigate to the PDFgear Online Excel to PDF Converter tool.
2. Tap on the Select Excel files button to upload an Excel spreadsheet file to PDFgear from File Explorer on your iPhone.
3. The uploaded Excel file will be automatically converted to a PDF for you to download onto your iPhone.
3. Make a PDF on iPhone from PowerPoint Presentations
1. Use a web browser on your iPhone like Safari and navigate to the PDFgear Online PPT to PDF Converter tool.
2. Tap on the Select PPT files button to upload a Microsoft Word document to PDFgear from File Explorer on your iPhone.
3. The PowerPoint file will be automatically converted to a PDF for you to download onto your iPhone.
Where do PDF files go on iPhone? The PDF file downloads from PDFgear can be accessed from the Books app on your iPhone. Additionally, don’t forget that there are dozens of other practical tools for you to try out on PDFgear.com!
The Bottom Line
Making a PDF on iPhones and iPads wasn’t meant to be tricky yet it does take time and effort in getting the job done, considering what we have and can have on our iOS devices. Luckily, with the given methods in this post, I’m sure you’ll be able to easily make and edit on your iPhone and iPad easily in the future. Now, have a try on any of the methods and see if it works for you!