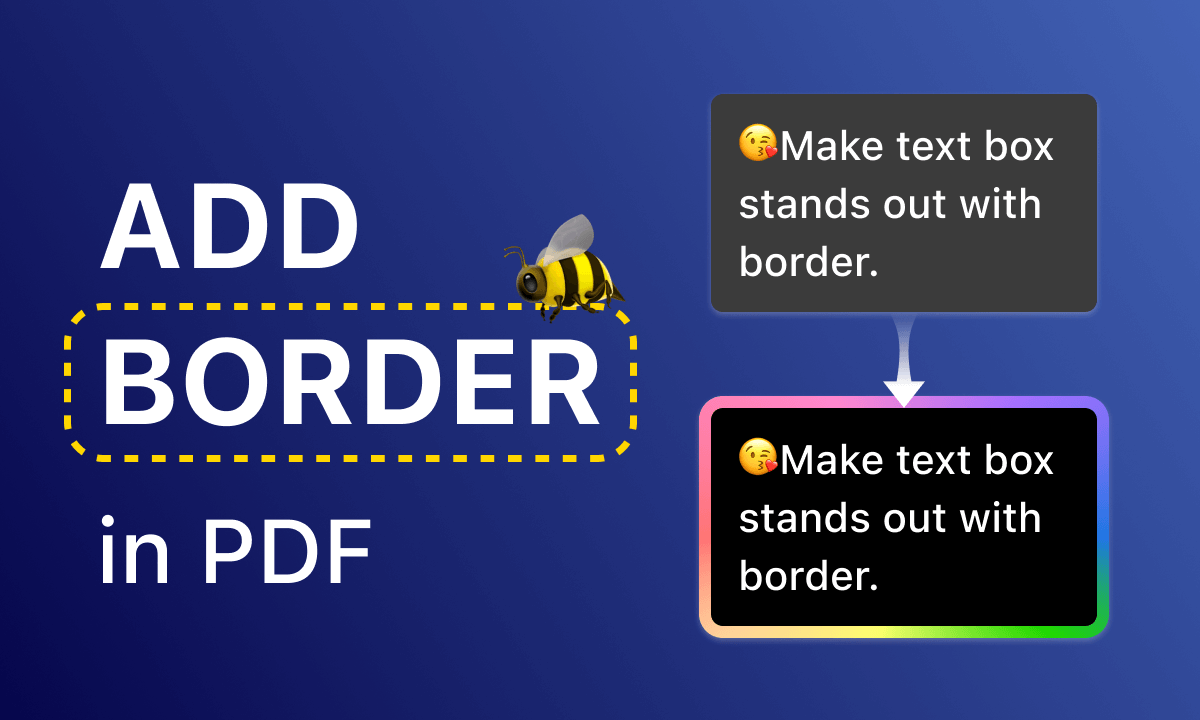
How to Add Borders to PDF Documents Easily and Efficiently

Summary :
This article provides clear instructions on how to add borders to PDF using Adobe Acrobat, PDFgear and Microsoft Word. Discover effective ways to enhance PDF documents.
Table of Contents
How to Add Borders to PDFs
When creating a PDF document, there is often a need to highlight certain areas or improve the aesthetics. In addition to directly editing PDF text, adding borders to PDF can also effectively solve this need and enhance the presentation effect.
In this article, we’ll explore specific ways to add borders to PDF using tools like Adobe Acrobat, PDFgear, and Microsoft Word.
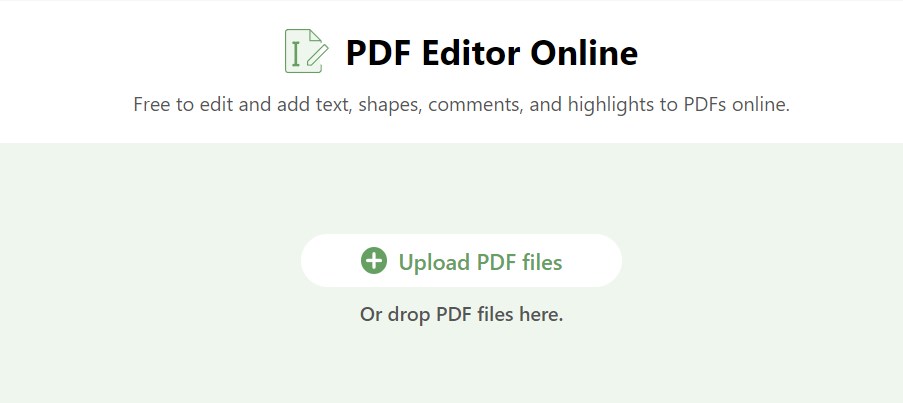
Add Border in PDF Online Free
PDFgear is a free PDF border maker that provides a convenient online solution for adding borders to PDF. This tool stands out for its ease of use and its wide range of features including text editing, PDF drawing, format conversion, etc.
It offers great functionality without installation, registration, or watermark.
Step 1. Access PDFgear online editor.
Step 2. Click “Upload File” or drag the file to the specified location to upload the PDF that needs to be edited.
Upload a PDF to PDFgear Online
Step 3. Click “Add or Edit Annotation” in the upper right corner > Click “Add Shape” > Select “Add Rectangle”.
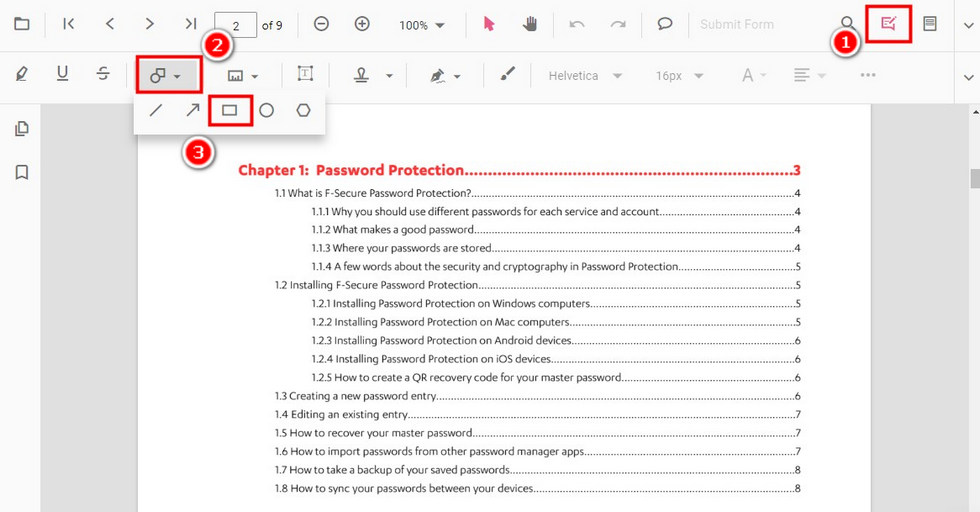
Add Border in a PDF Online
Step 4. You can change the color and thickness of the border through the icons in the menu bar in the upper right corner.
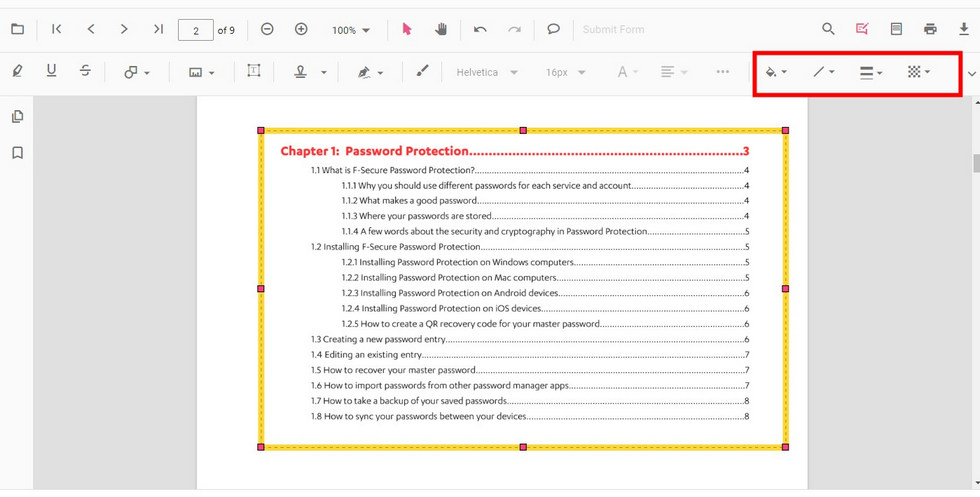
Custom Border Online
Step 5. Click the “Download” icon to save the bordered PDF.
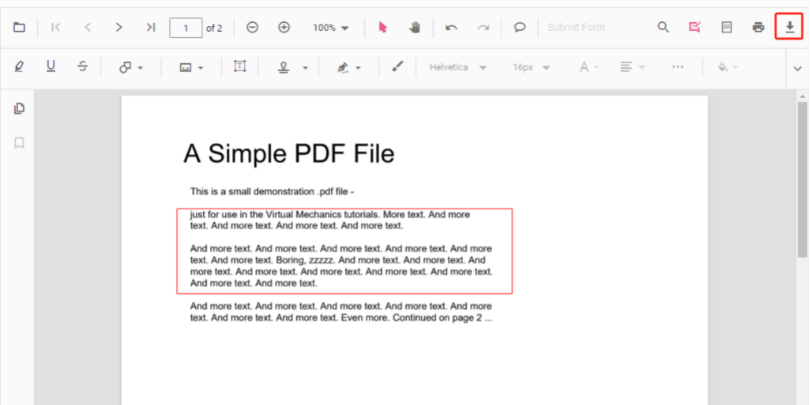
Save PDF with Border
How to Add Border in PDF with Adobe Acrobat
Adobe Acrobat Reader is a professional PDF creation and editing tool that provides an effective way to add arbitrary shapes to elements in PDFs. With its intuitive tools, you can add custom borders to PDFs.
Step 1. Open the PDF in Adobe Acrobat Reader.
Step 2. Click “Tools” in the upper menu bar > select “Comments”.
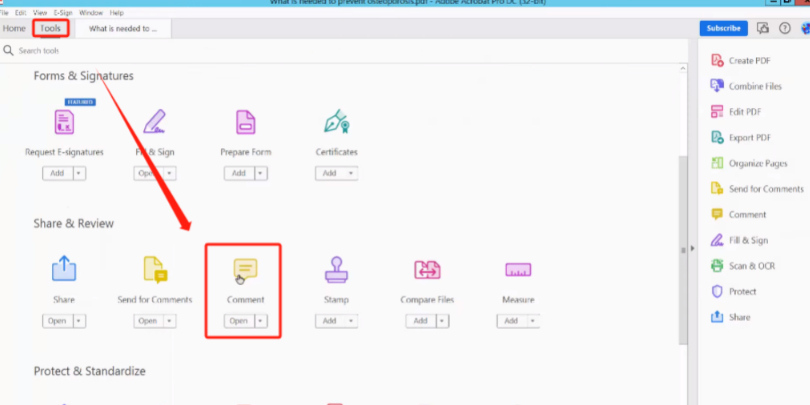
Enter Edit Mode
Step 3. Click “Shape” > select “Rectangle” > drag the cursor to add a shape at the correct position. Then you can see the border around the text or page.
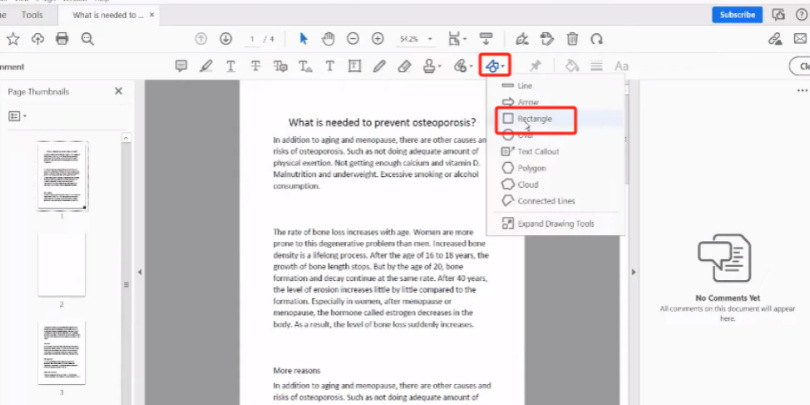
Add Border to PDF
Step 4. Select the border and click on the “Properties” button. In the pop-up window, you can customize the color, thickness, line style, etc. of the border.
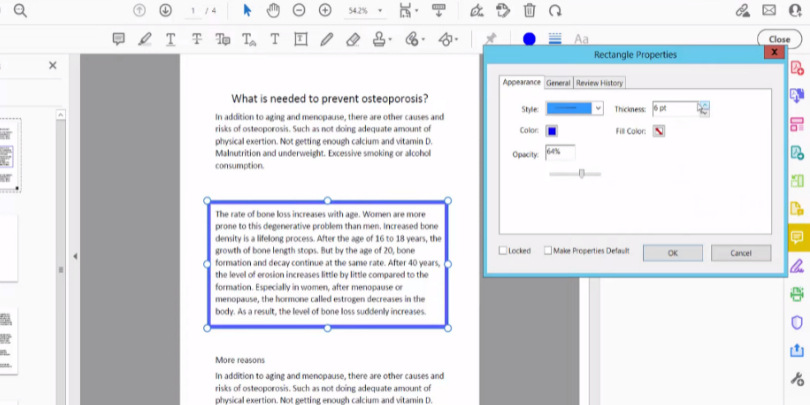
Custom Border
Step 5. Save changes.
How to Add Page Border in PDF
Microsoft Word is a landmark professional office software. Editing PDFs in Word is also very easy. Microsoft Word provides a quick and easy way to add borders to PDF pages. Its rich customization features, such as border thickness, color, design, etc., can make documents look more beautiful.
Step 1. Open the PDF in Microsoft Word.
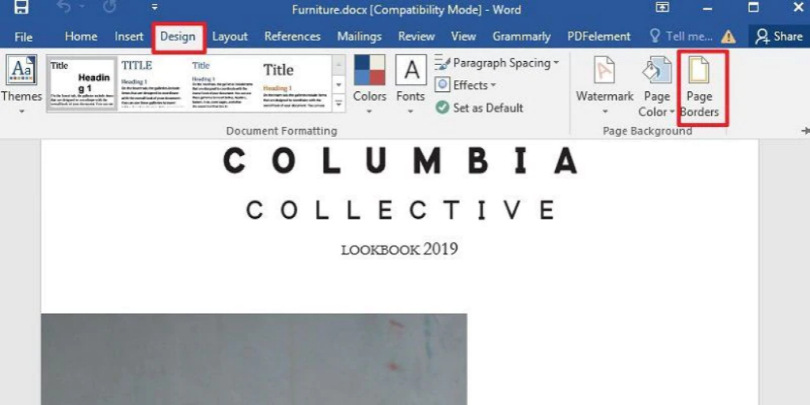
Step 2. Click “Design” in the toolbar > click “Page Border”.
Add Page Border
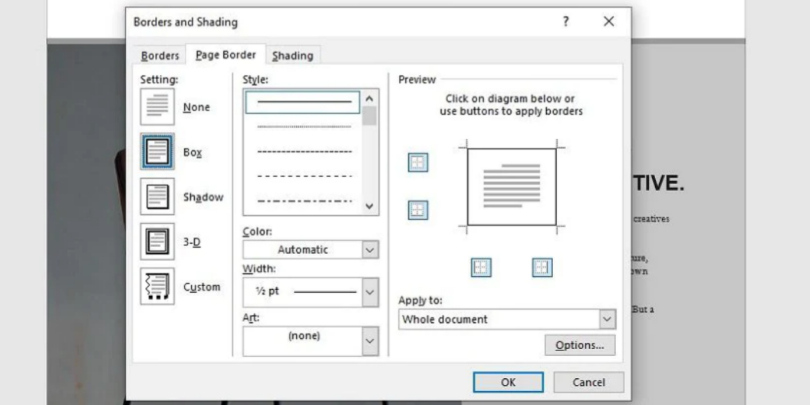
Step 3. In the pop-up window that appears, customize the border style as needed. Then click “OK” to apply the page borders to the entire document.
Custom Page Border
Step 4. Click “File” > “Save” > “Save As” > “PDF” to save the document as a PDF with a border.
Keep in mind that when editing PDFs with Word, formatting loss may occur. To avoid this situation, we recommend using PDFgear converter to convert PDF to Word for editing.
FAQs
How Do I Add Border to PDF Online?
Open the PDFgear online editor > Upload PDF > Add or Edit annotations > Add shapes > Select a rectangle to add a border at the appropriate location.
How Do You Add a Border on Pages on a Mac?
The method of adding borders to PDF using Adobe Acrobat Reader also applies to Mac. Open PDF > Click “Tools” > Select “Comments” > Click “Shape” > Select “Rectangle” > Drag the cursor to add a border at the correct position.
How Do You Add a Decorative Border Around Text?
When using PDFgear, you can customize the color, style, etc. of borders and add them around text in PDFs.